Hey hey! We’re in the home stretch! Just one week until all of the featured designers and participants reveal their ORC spaces. Before we get to the picture rail, if you’re just joining in, you can catch up on my past weeks here: Week 1: Befores | Week 2: The Plan | Week 3: The Built-Ins | Week 4: The TV | Week 5 – Paused | Week 6 – Textiles and Wall Color
Gallery Wall?
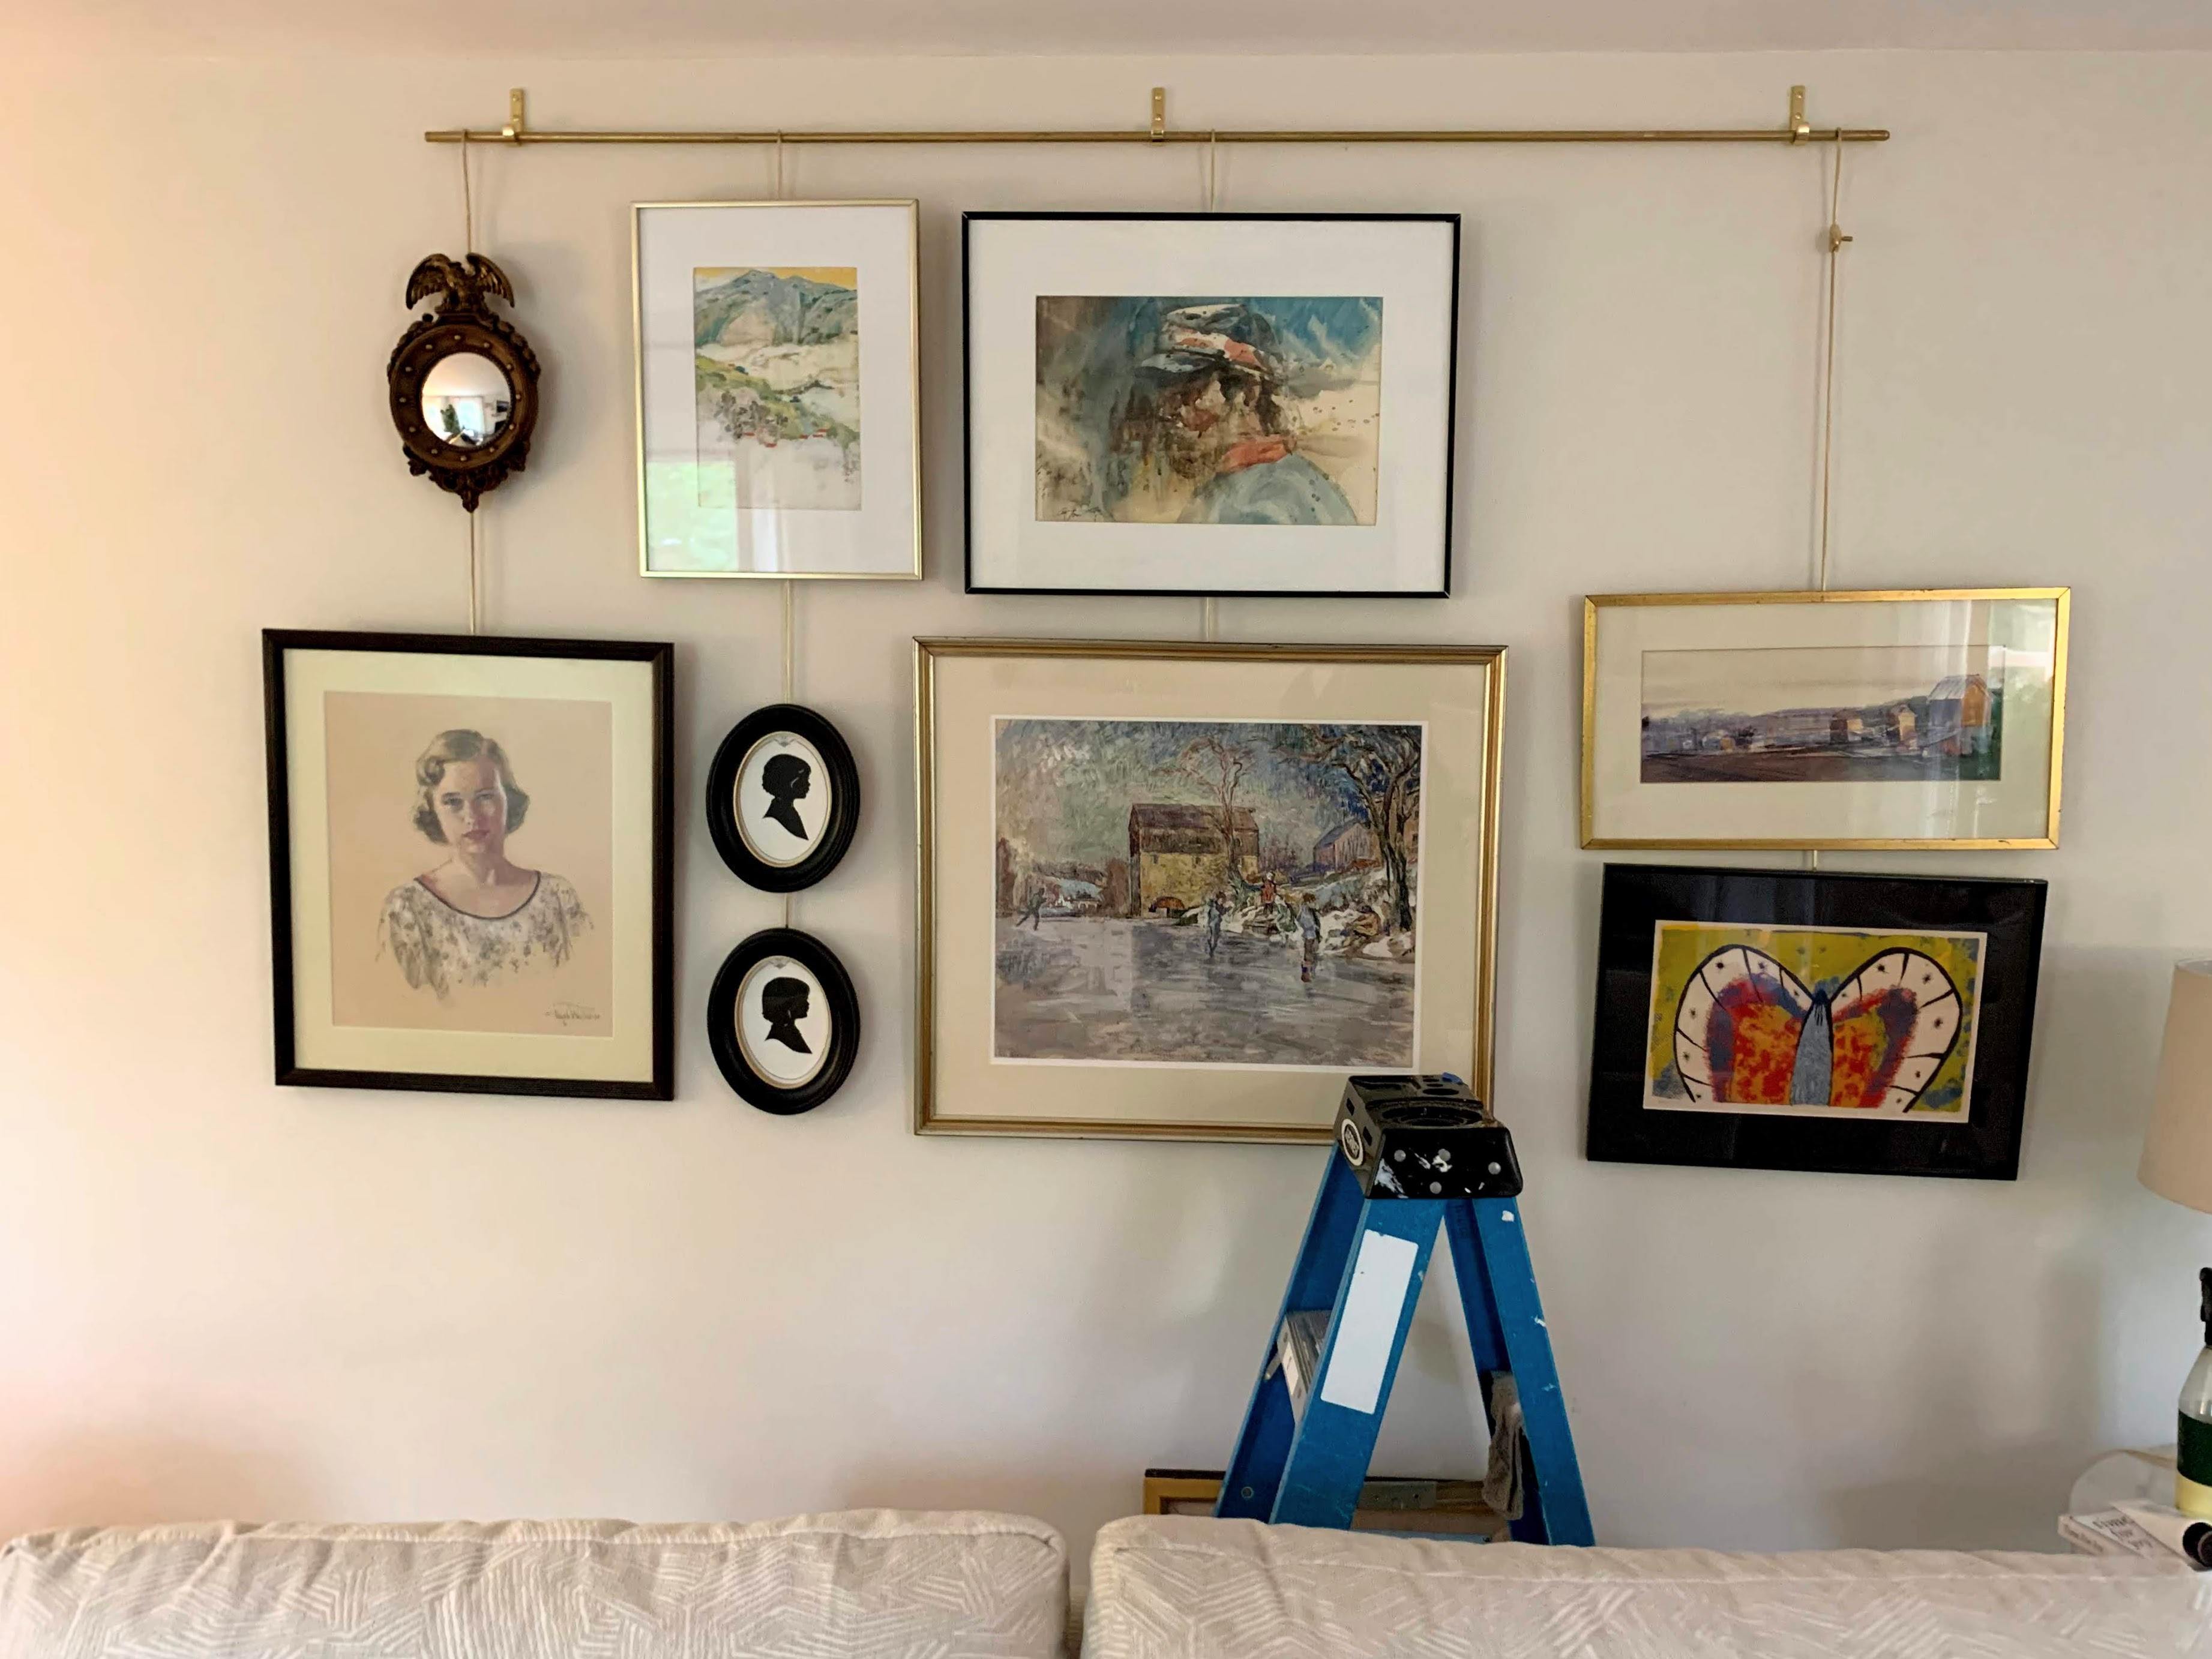
Opposite our fireplace in this narrow living room is the long side of the sofa and a big ole blank wall. We have been so fortunate to inherit lots of fantastic art, and continue to add to the collection when we can. So, I’ve always had some version of a gallery wall there. Once the walls were painted and the furniture was in, I figured I’d do the same again, and promptly hung a bunch of art.
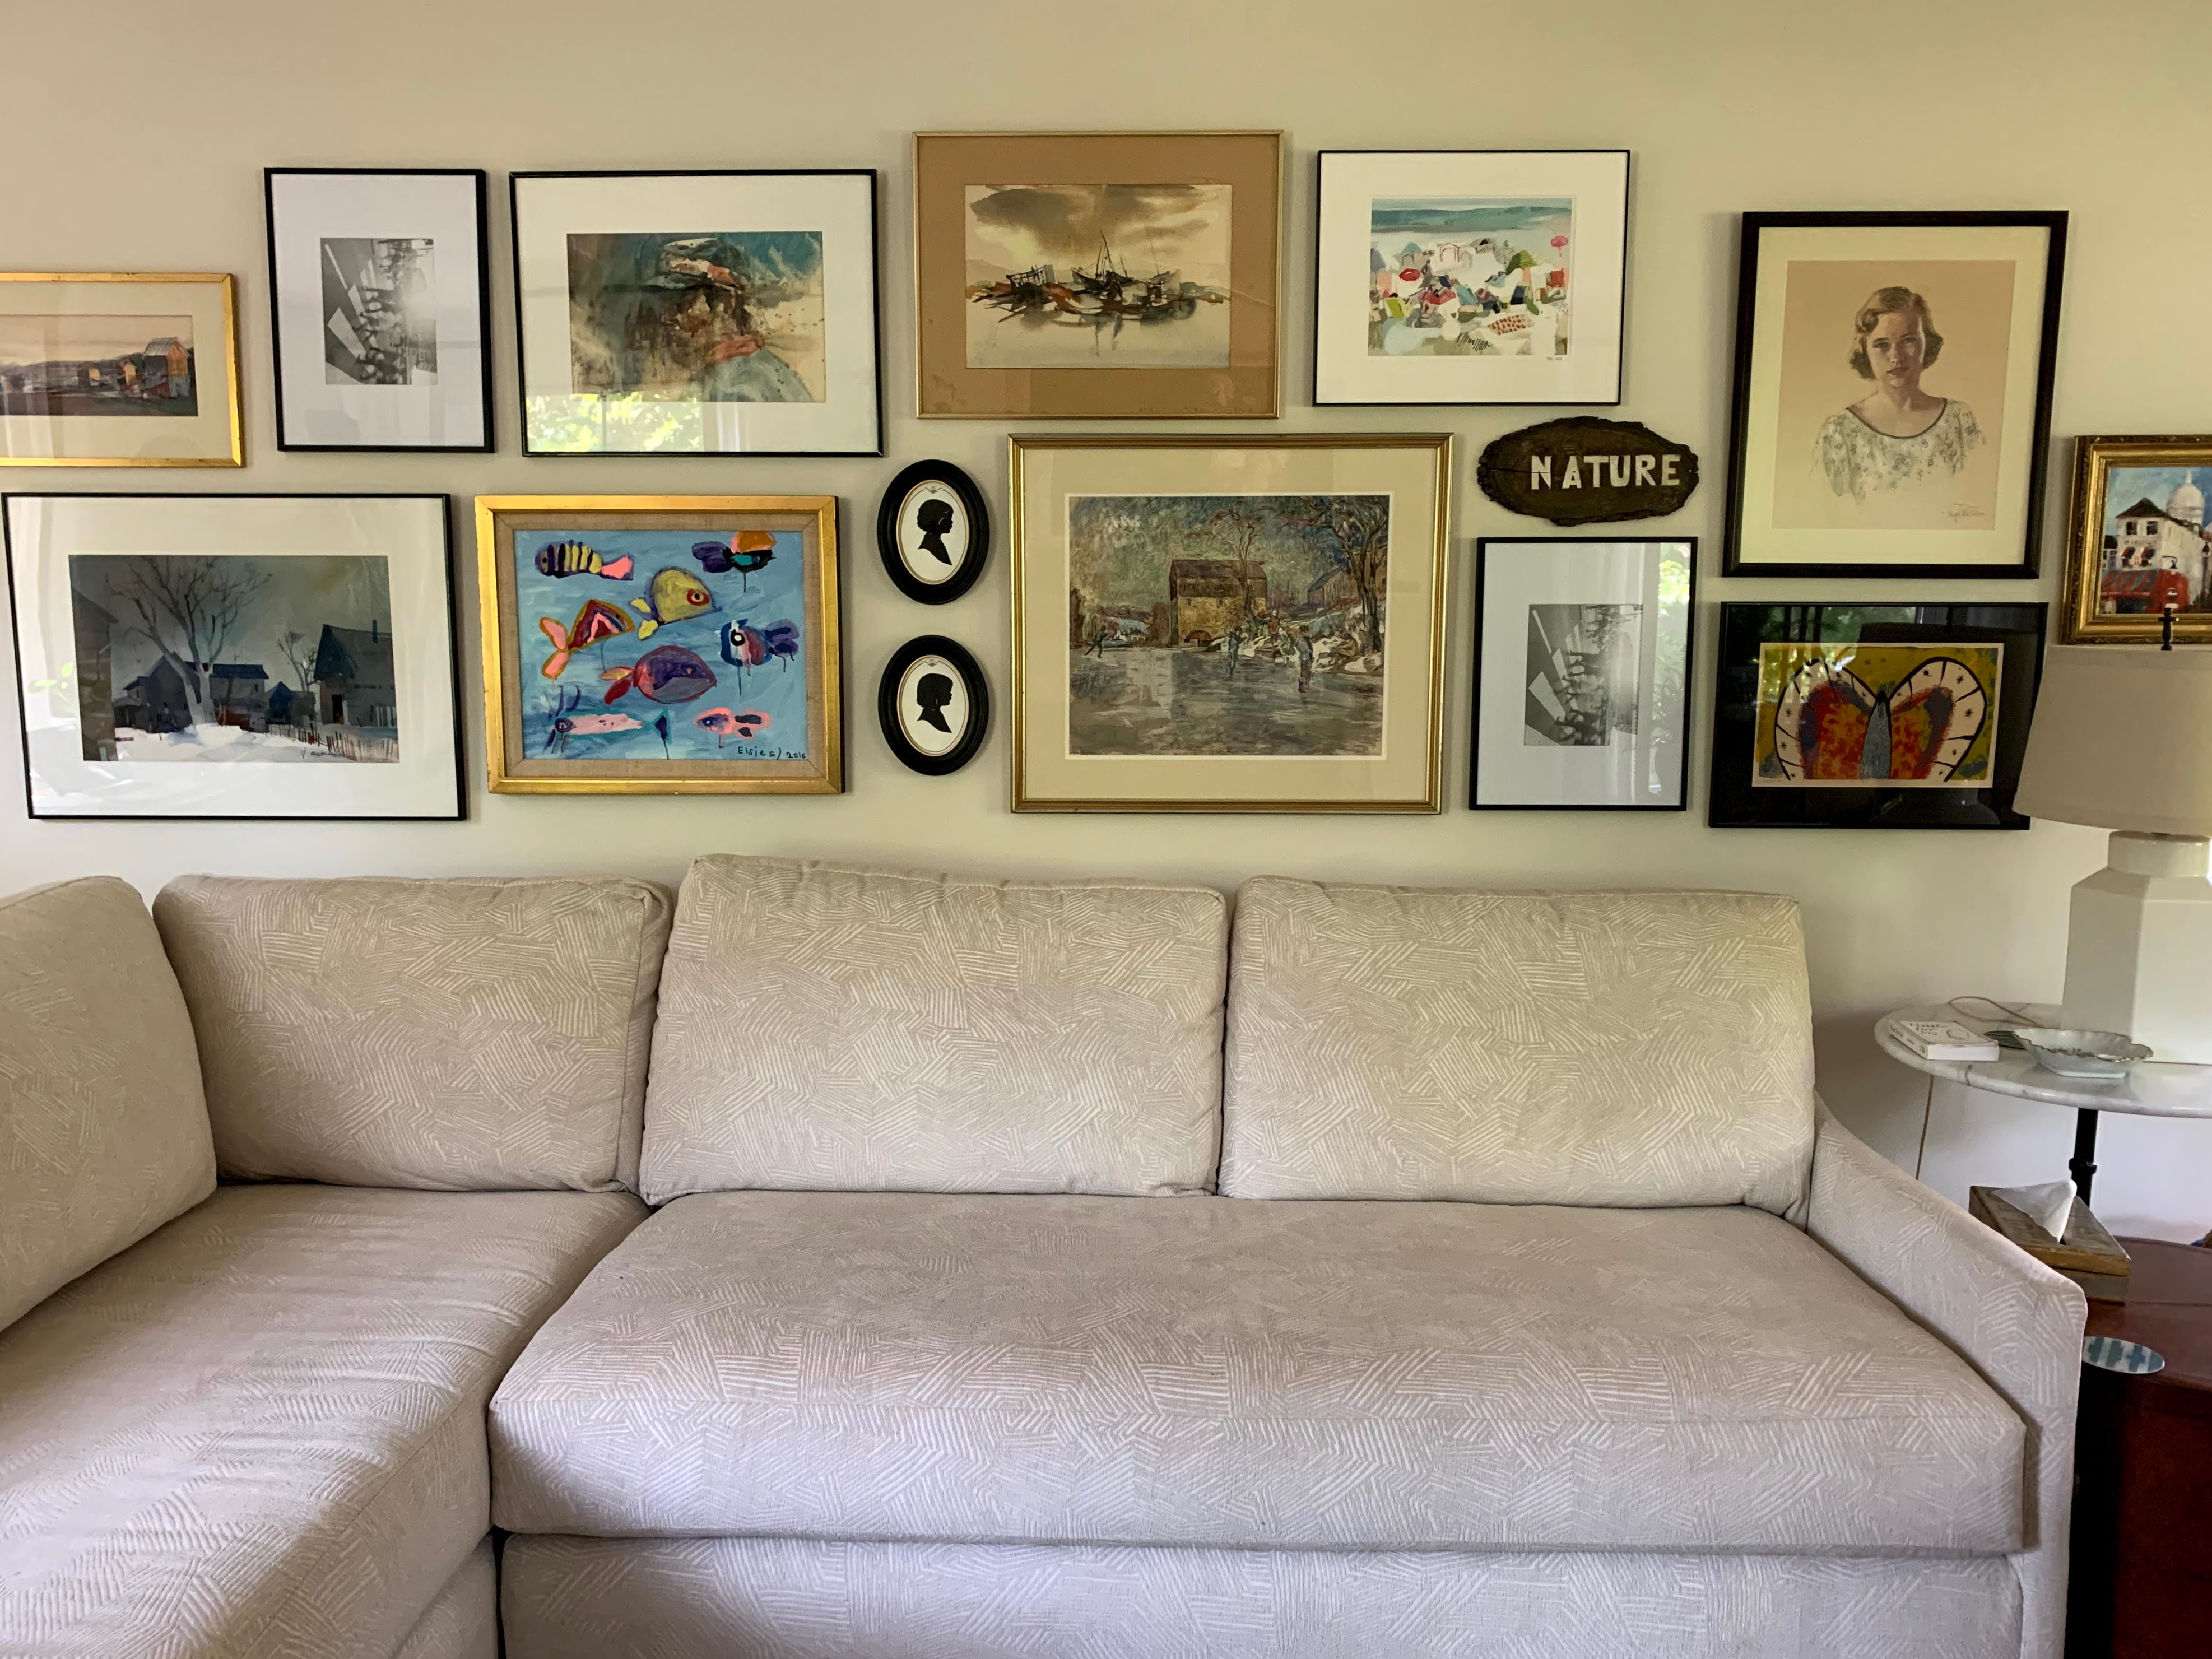
It’s a mixture of original art, prints, kid art, and a couple of new frames.
Once I had the art up, it just felt meh. I started brainstorming something that would be a bit more interesting and unique.
I’ve always loved picture rails…the molding that is installed on the wall, typically below crown molding or in lieu of crown. Art is hung usually from a chain hooked to the rail, which allows for easy changes, as no holes are put in the walls.
Inspiration
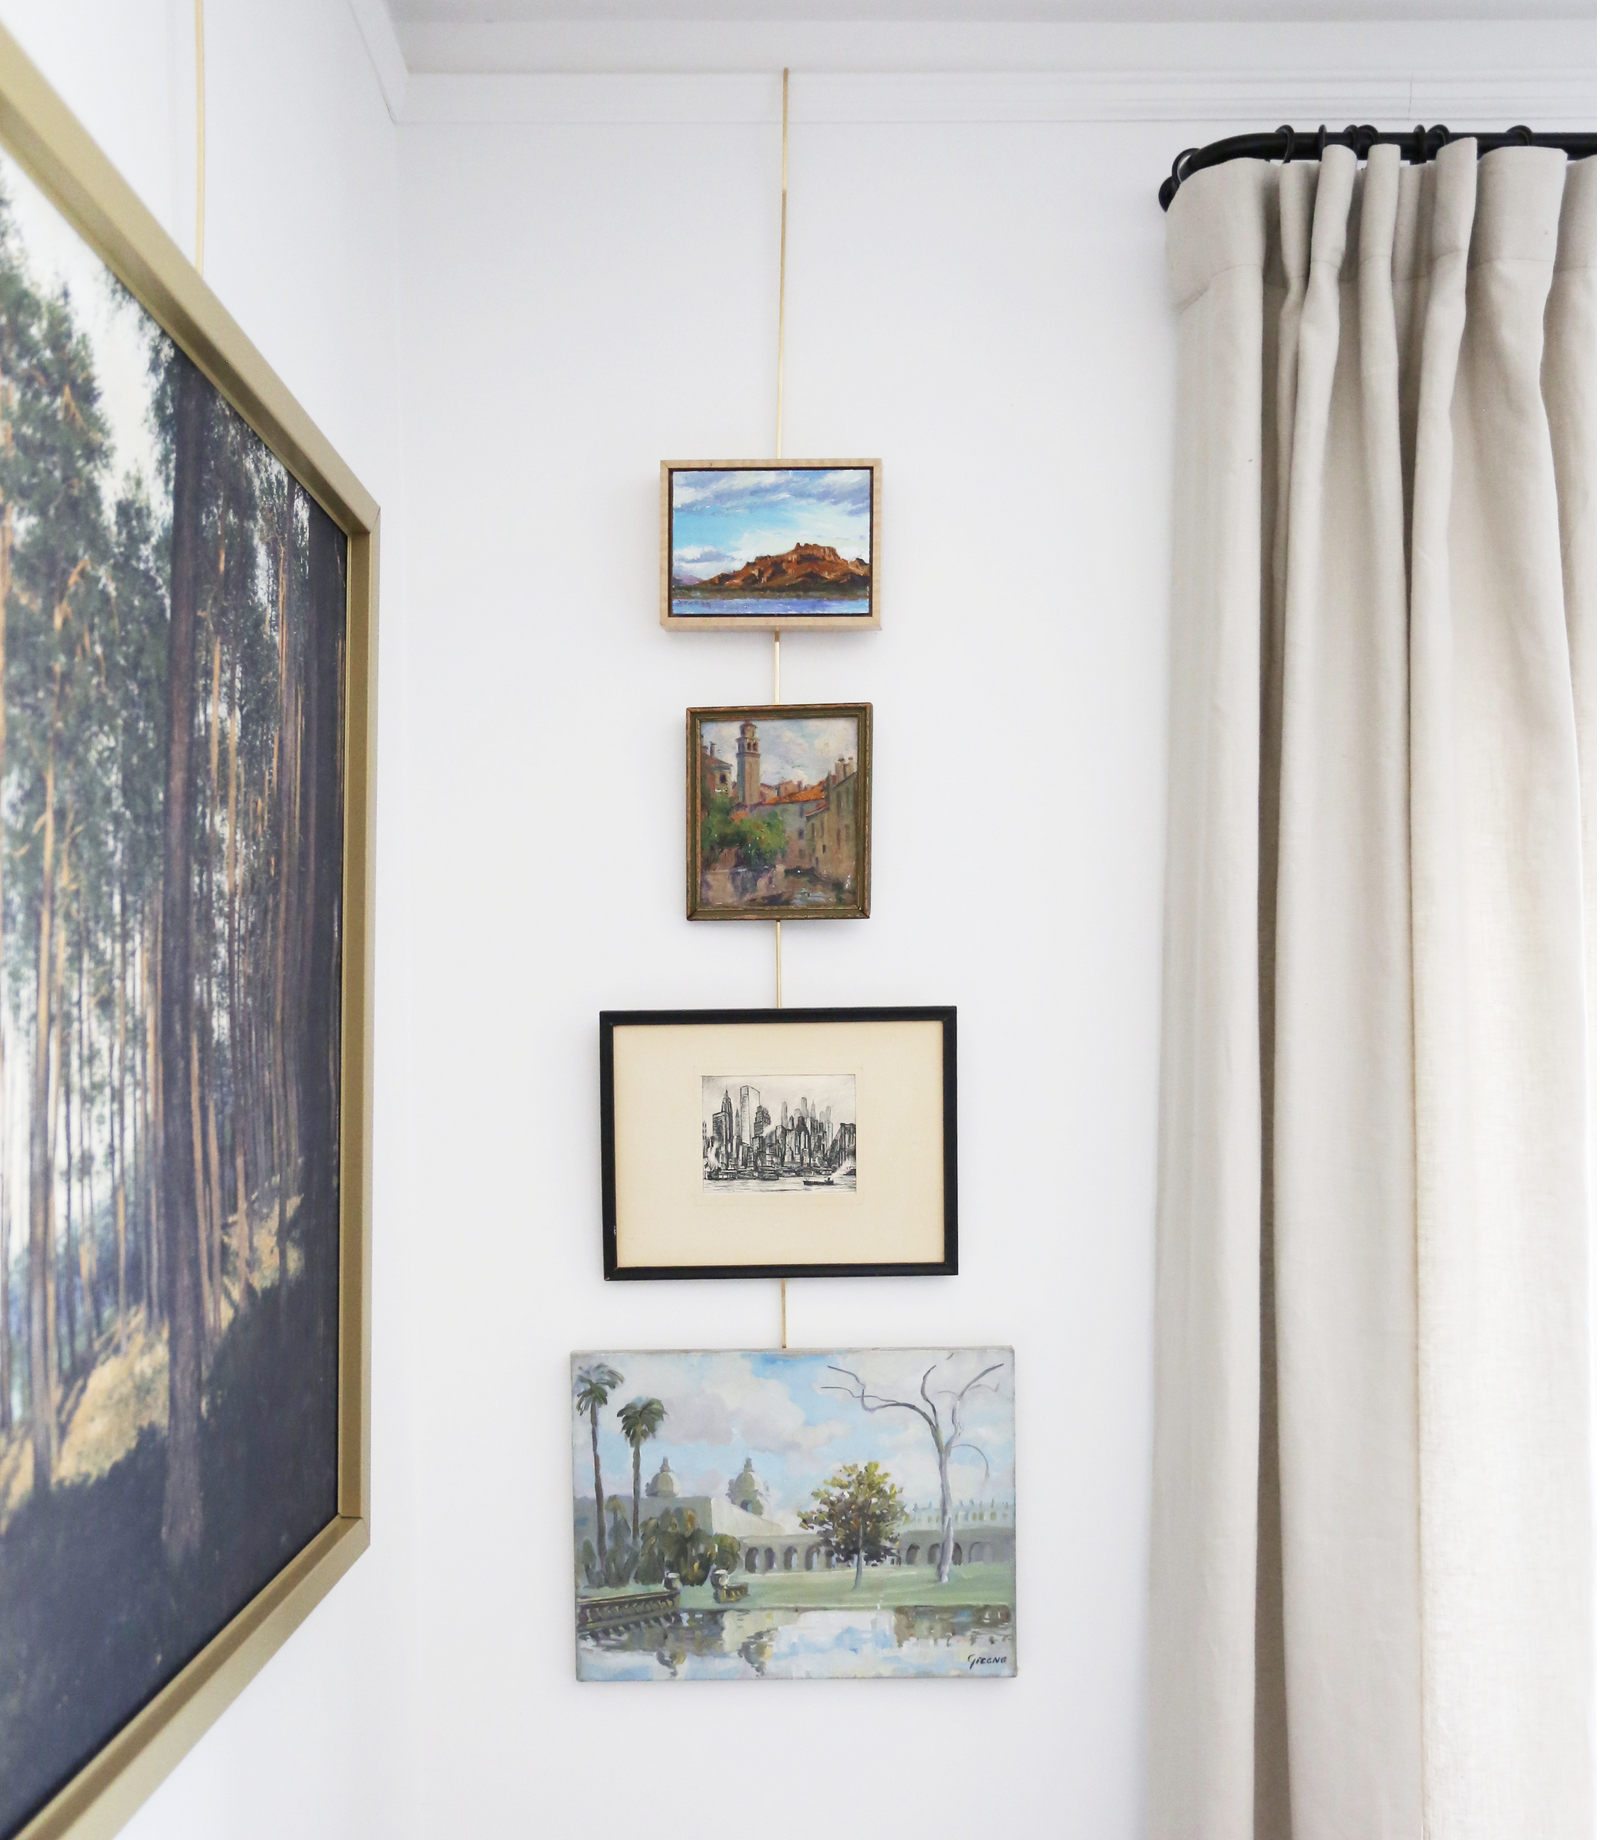
I had remembered Jenny Komenda sharing a whole house project where they utilized the original picture rail in the home. Instead of chains, they used brass rods made for this purpose. Here’s a look at a corner of the dining room. It was the Evergreen House project.
Juniper Home
I just love the clean, modern lines of these brass rods. The problem? We don’t have picture rail in our home. In fact, we don’t even have crown molding. I really wasn’t interested in installing molding, though. As I started thinking and googling and researching, I found some picture rail systems for sale.
Ballard sells a brass and acrylic 48″ system and Pottery Barn has a more industrial version that comes in 36″ sections.
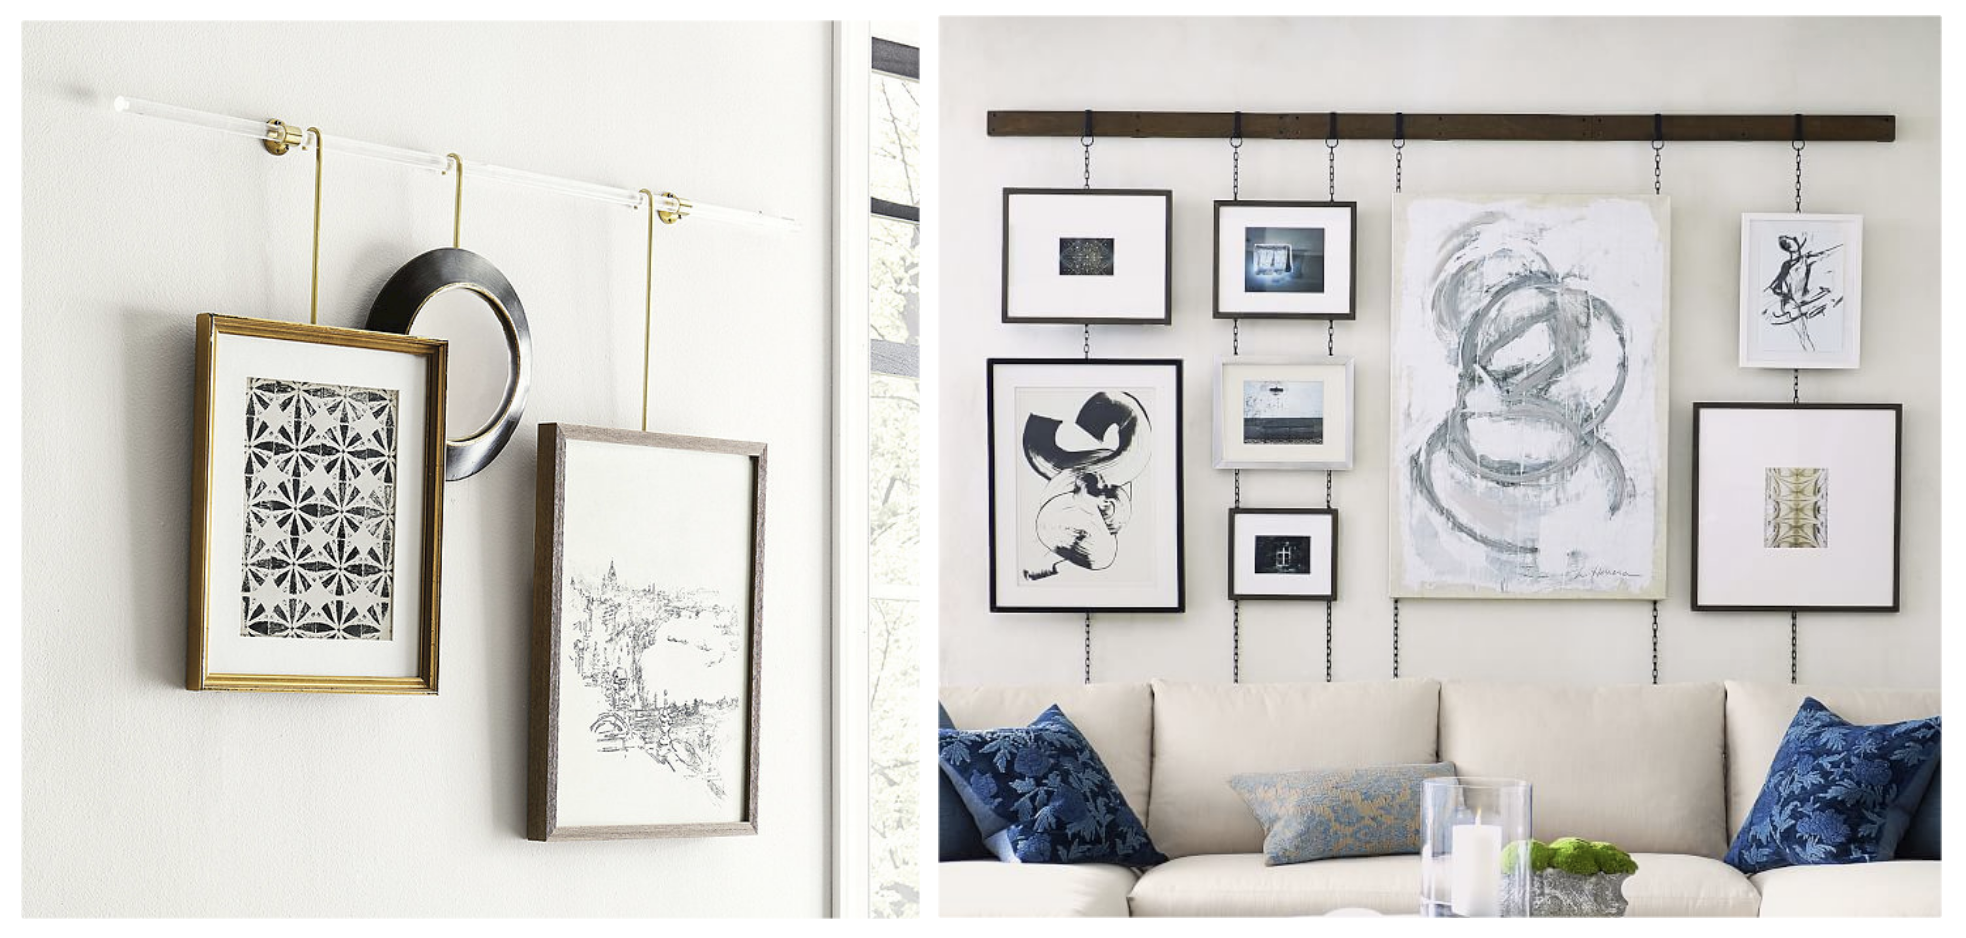
Neither of those were quite right for my vision, so I decided to put together my own system.
Picture Rail Components
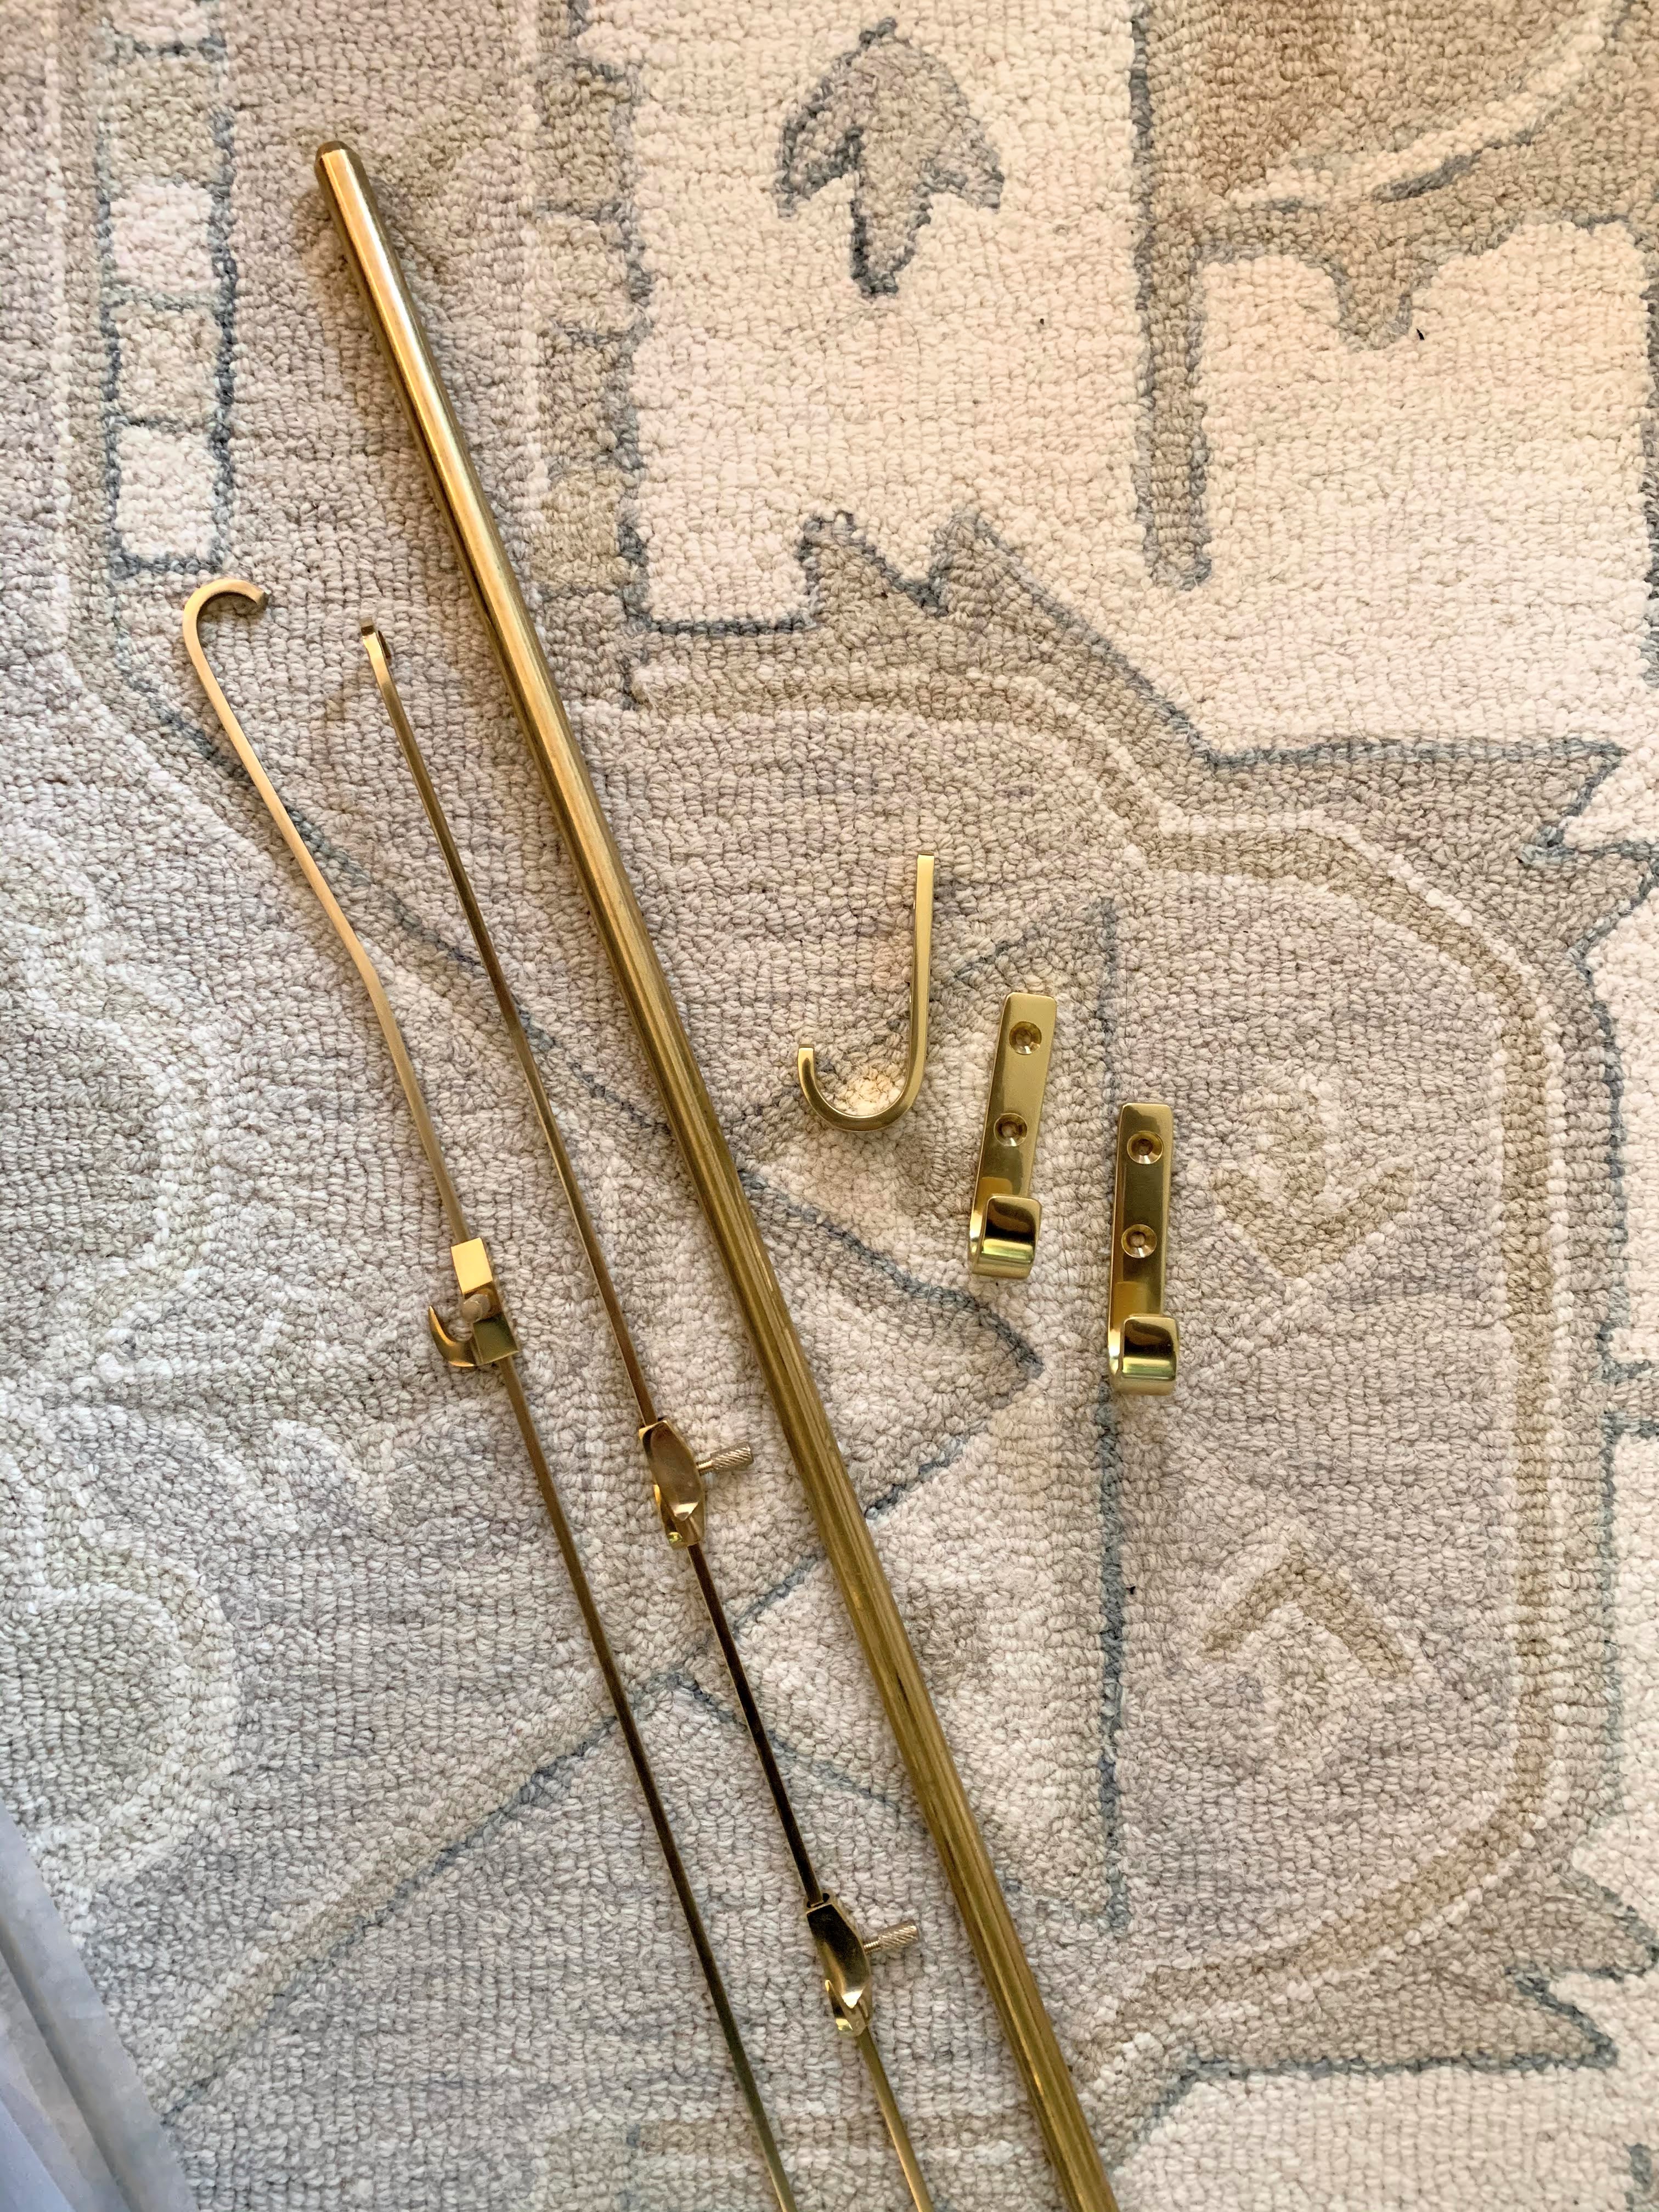
I found a 6′ solid brass rod at a construction supply store, Grainger. They had several options, and I chose the 1/2″ diameter, which works well. (Rather than risk it bending during delivery, I picked it up at the Raleigh location).
For the hooks to attach the rod to the wall, I considered several, and ended up going with these solid brass J hooks from Rejuvenation. I liked that they would patina the same as the rod, and that they held the rod close to the wall.
The picture rods themselves are from a small shop called Swan’s. When they arrived I was so impressed at the quality and craftsmanship. They are truly lovely on their own. The top of the rod hooks over your molding (or in my case, the 6′ rod), and the picture hooks slide up and down by loosening a little dial. Each rod comes with one hook, but you can purchase more. I got four rods and a total of 10 hooks.
 Installation was simple enough. I started with the J hooks, making sure to install them on studs and keep them level. Then, the 6′ rod simply sits in the hook, and the picture rods hook right over that.
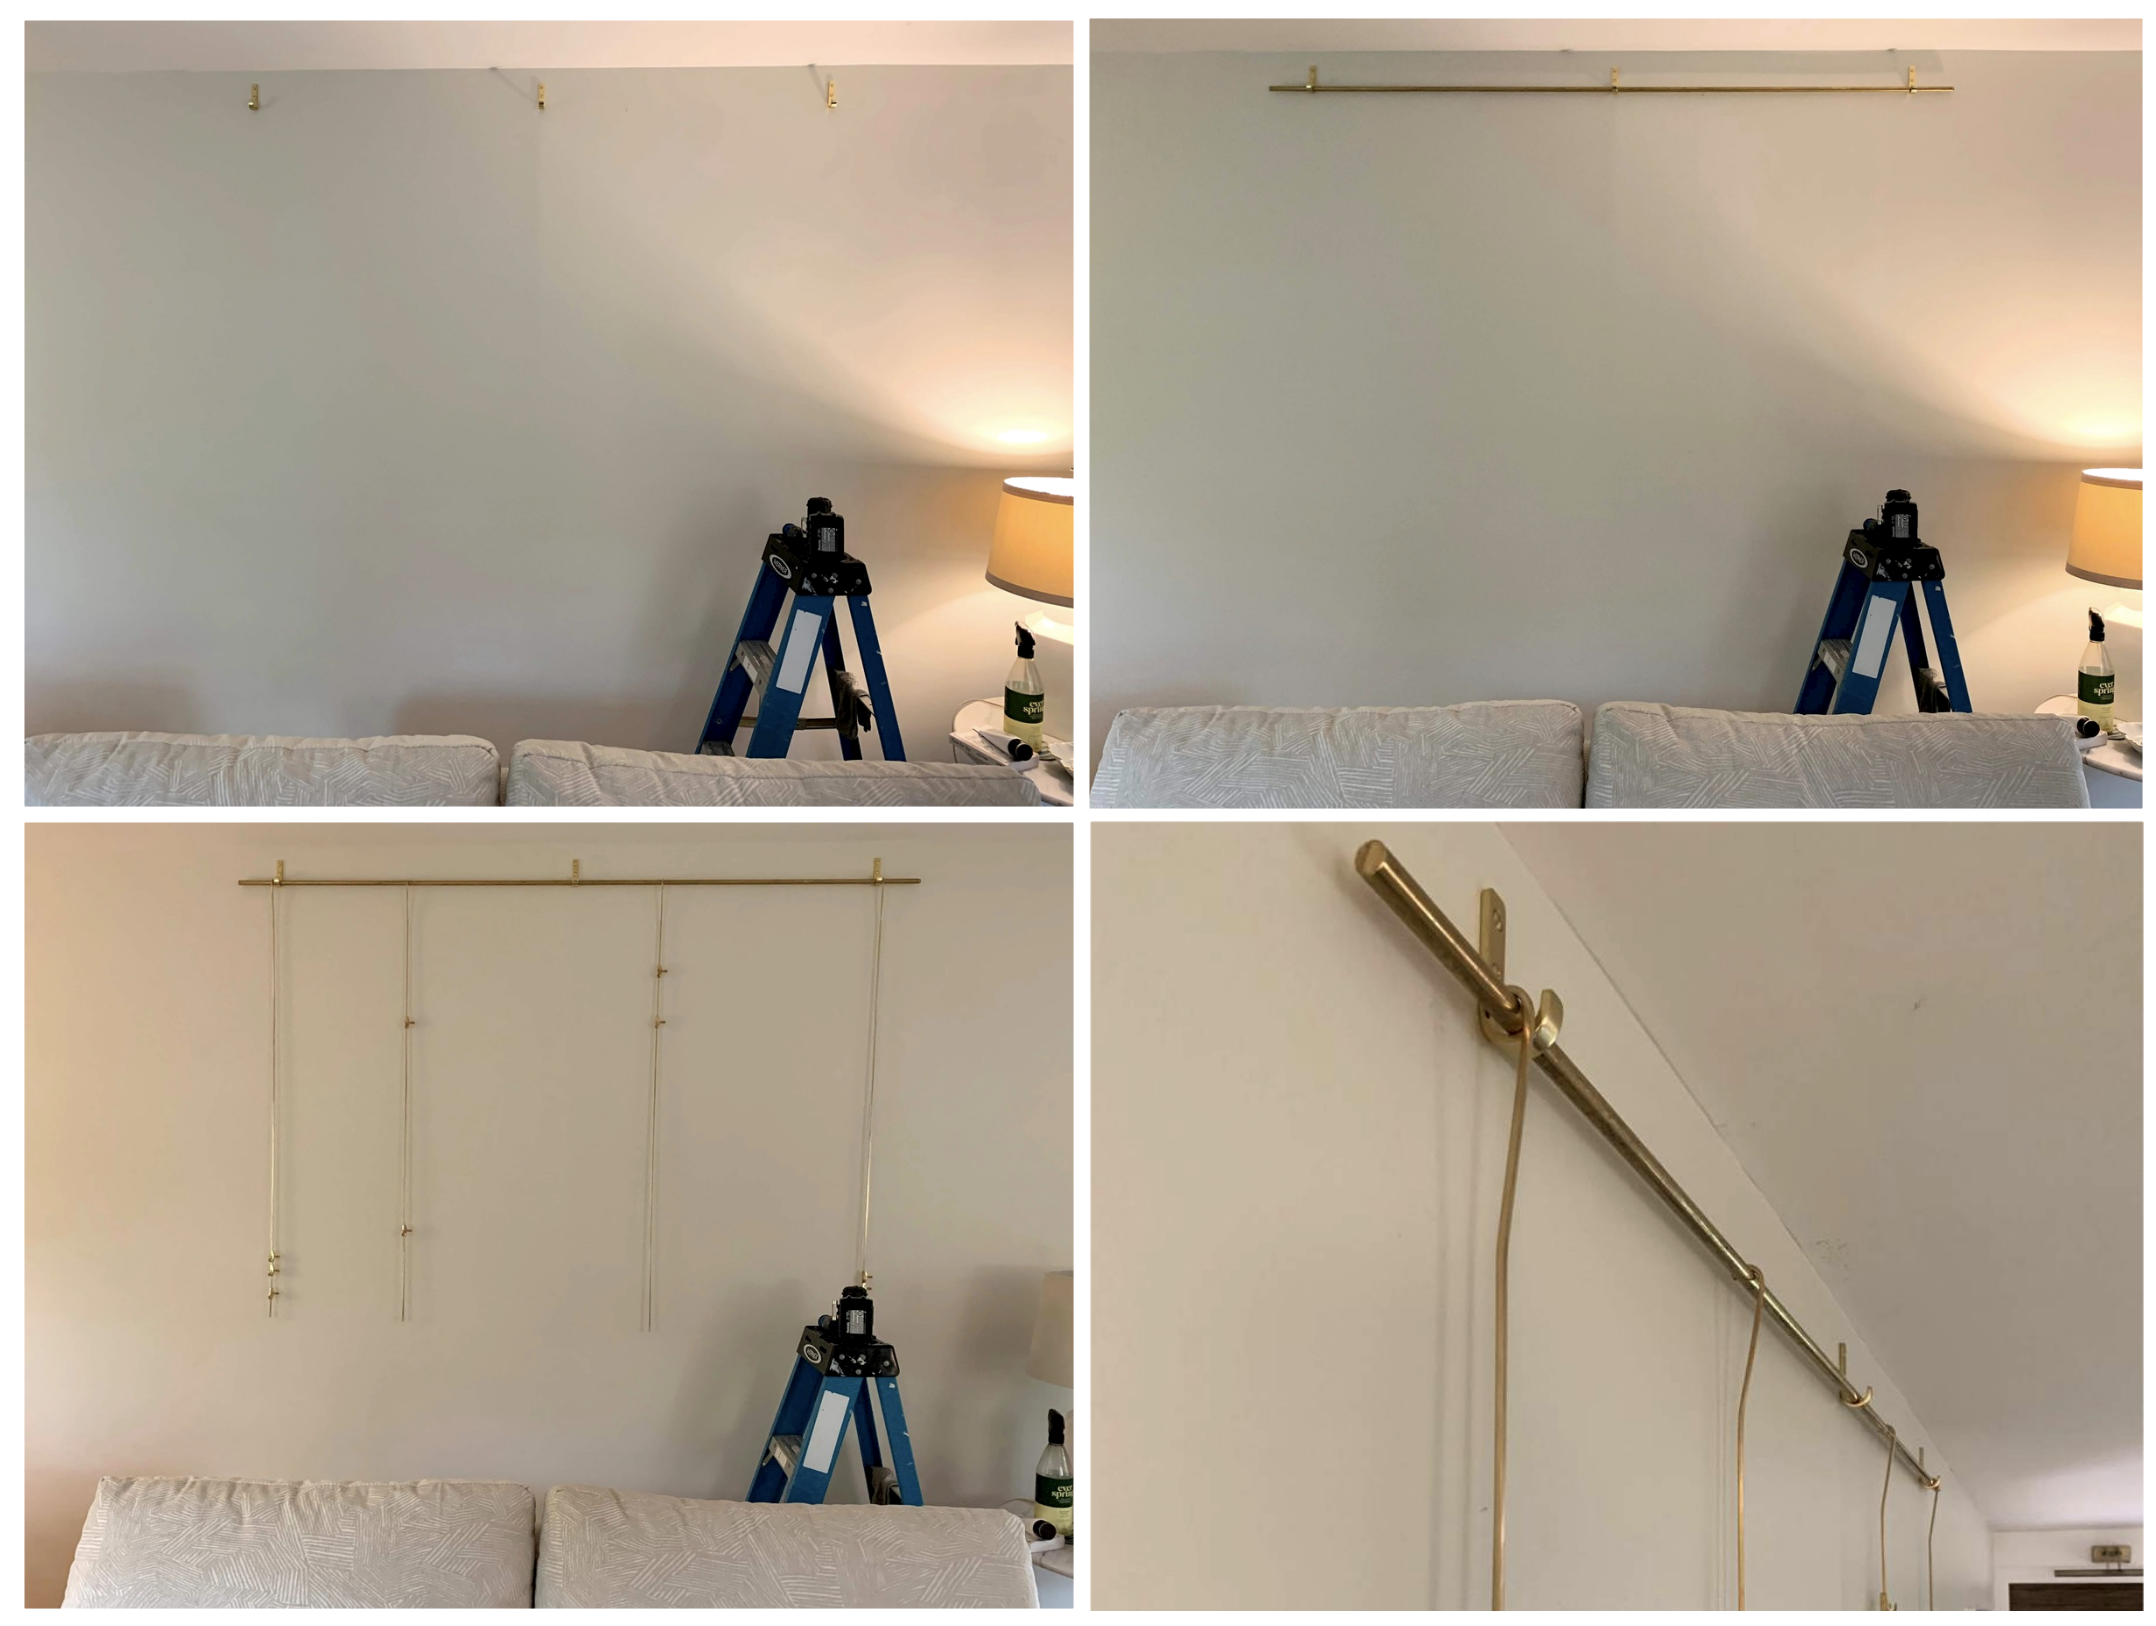 A strategic bend near the top of the picture rods keeps the paintings close to the wall. Now for the fun part! I started playing around with different configurations.
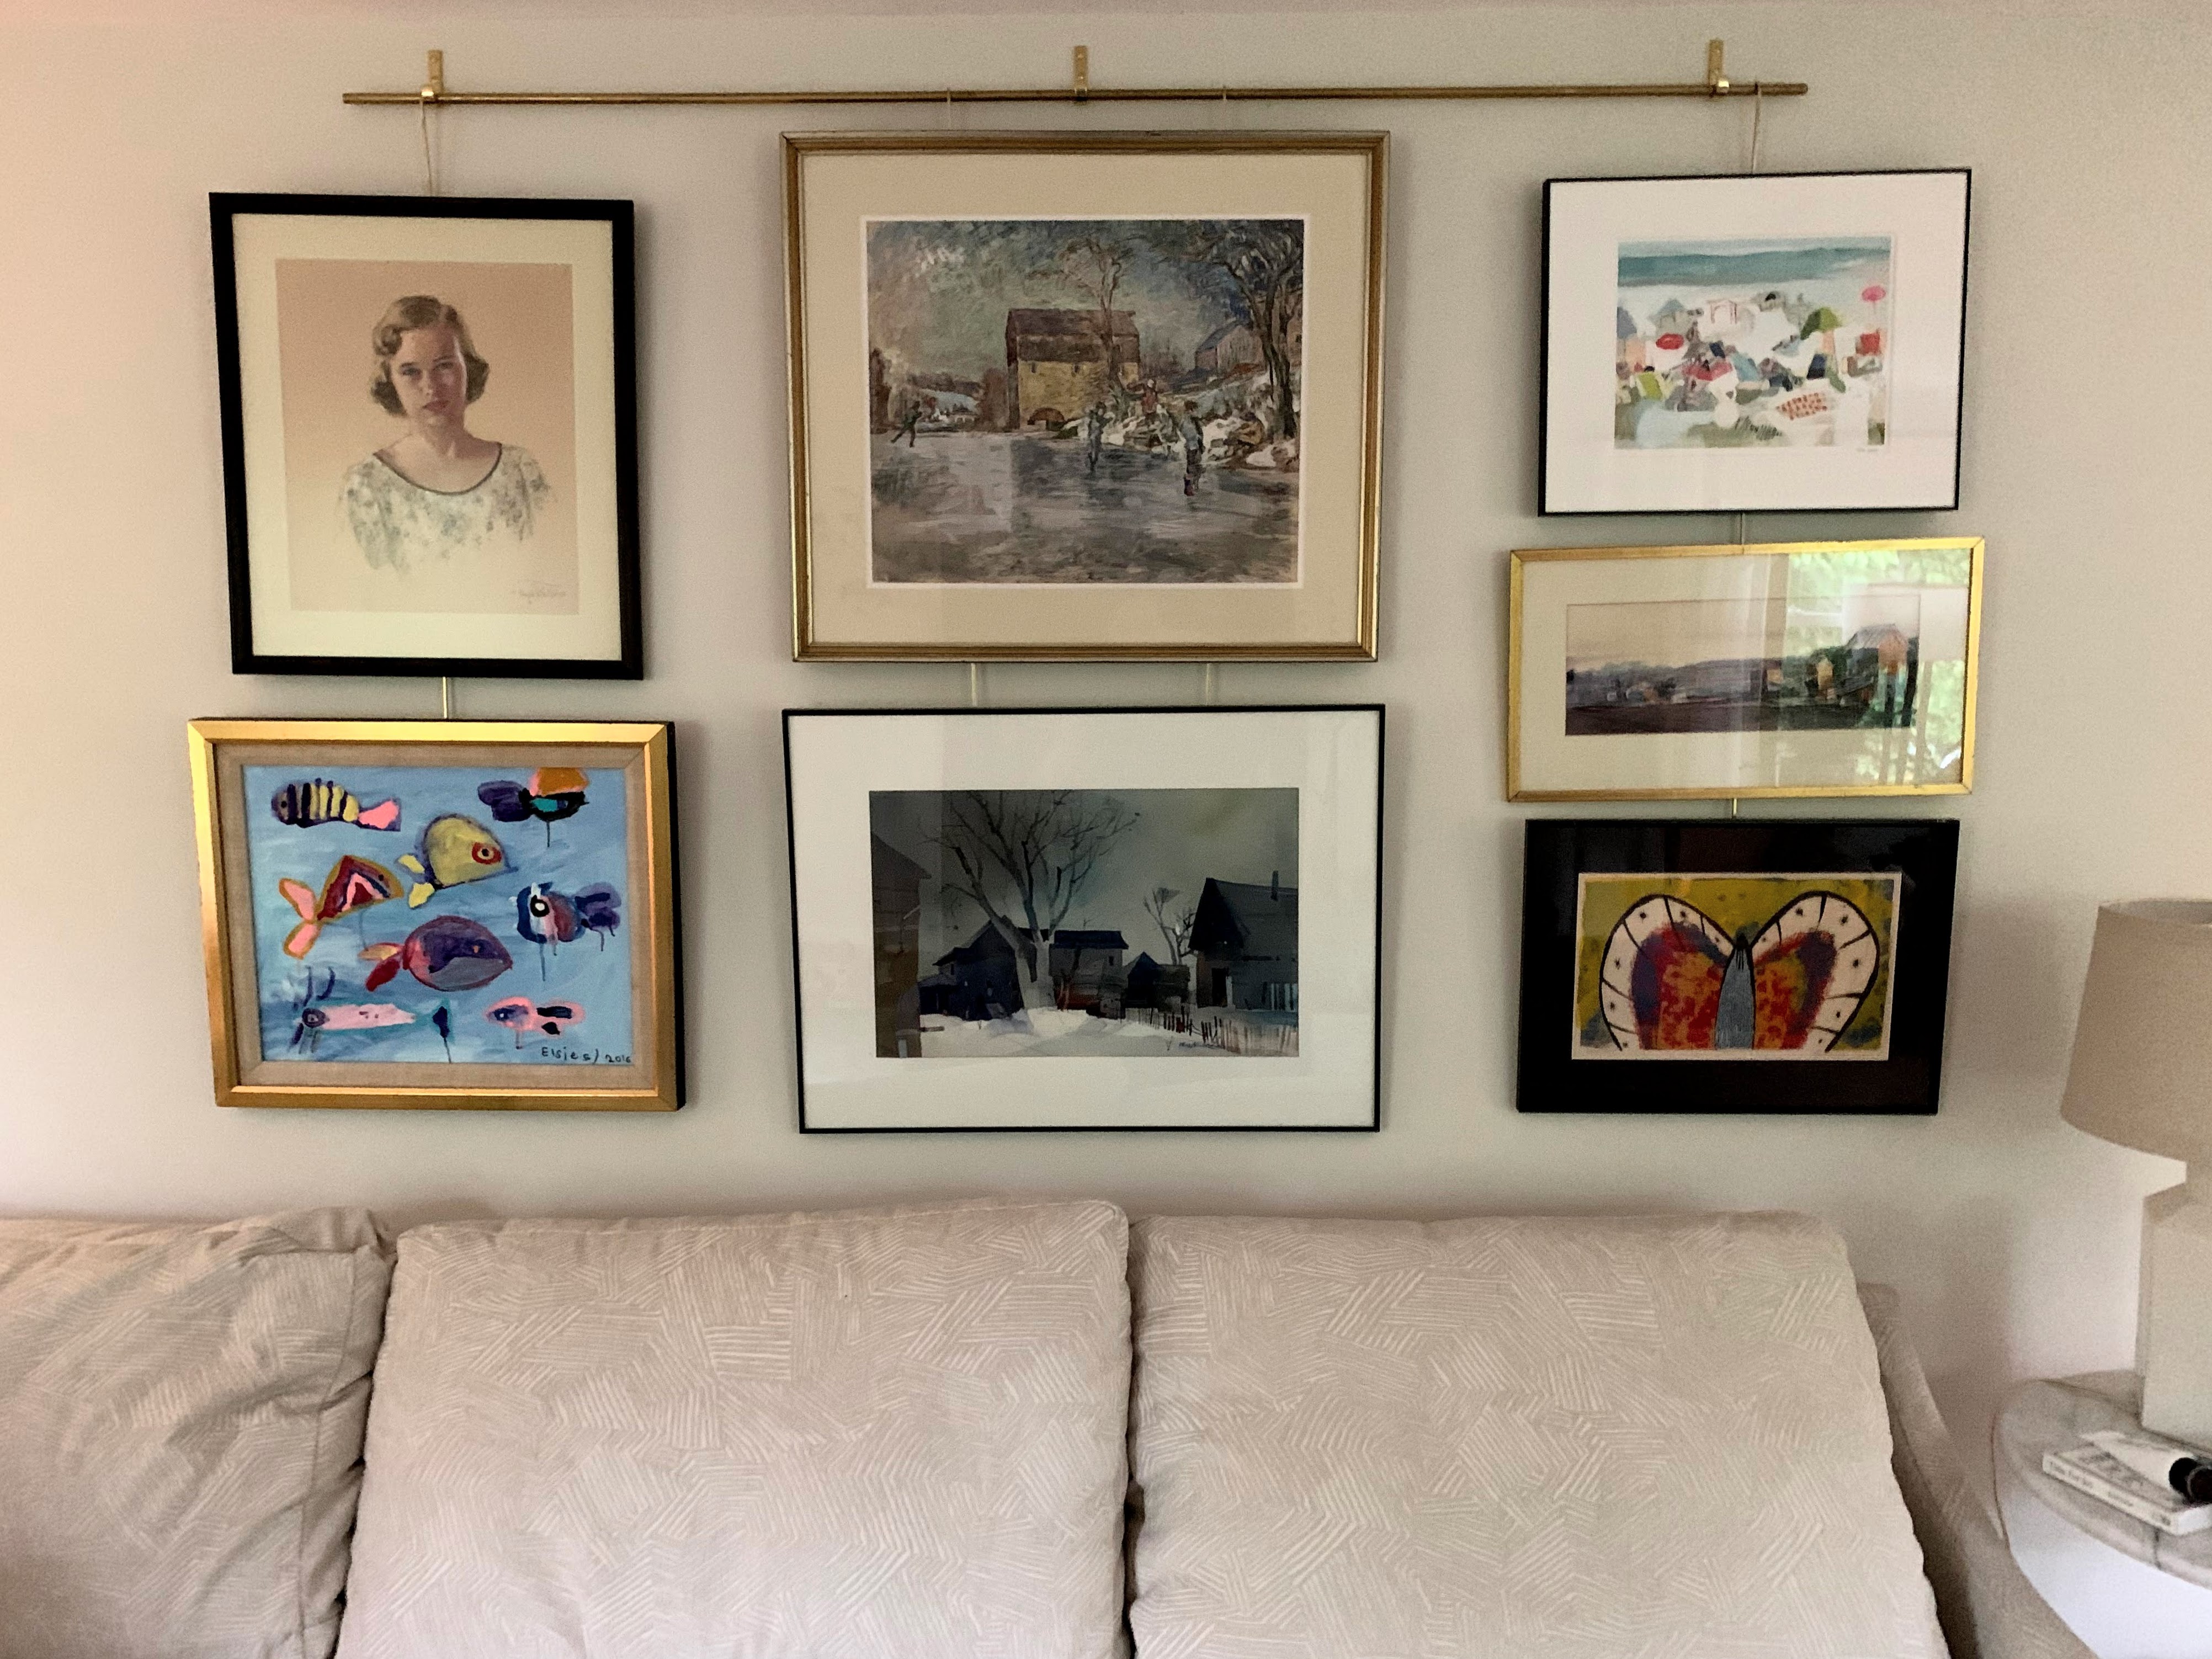
I decided less was more, and ended up keeping it pretty simple. Using two rods to hang one large piece helped. I also found that adding these rubber bumpers to the back bottom corners of the frames helps keep things level.
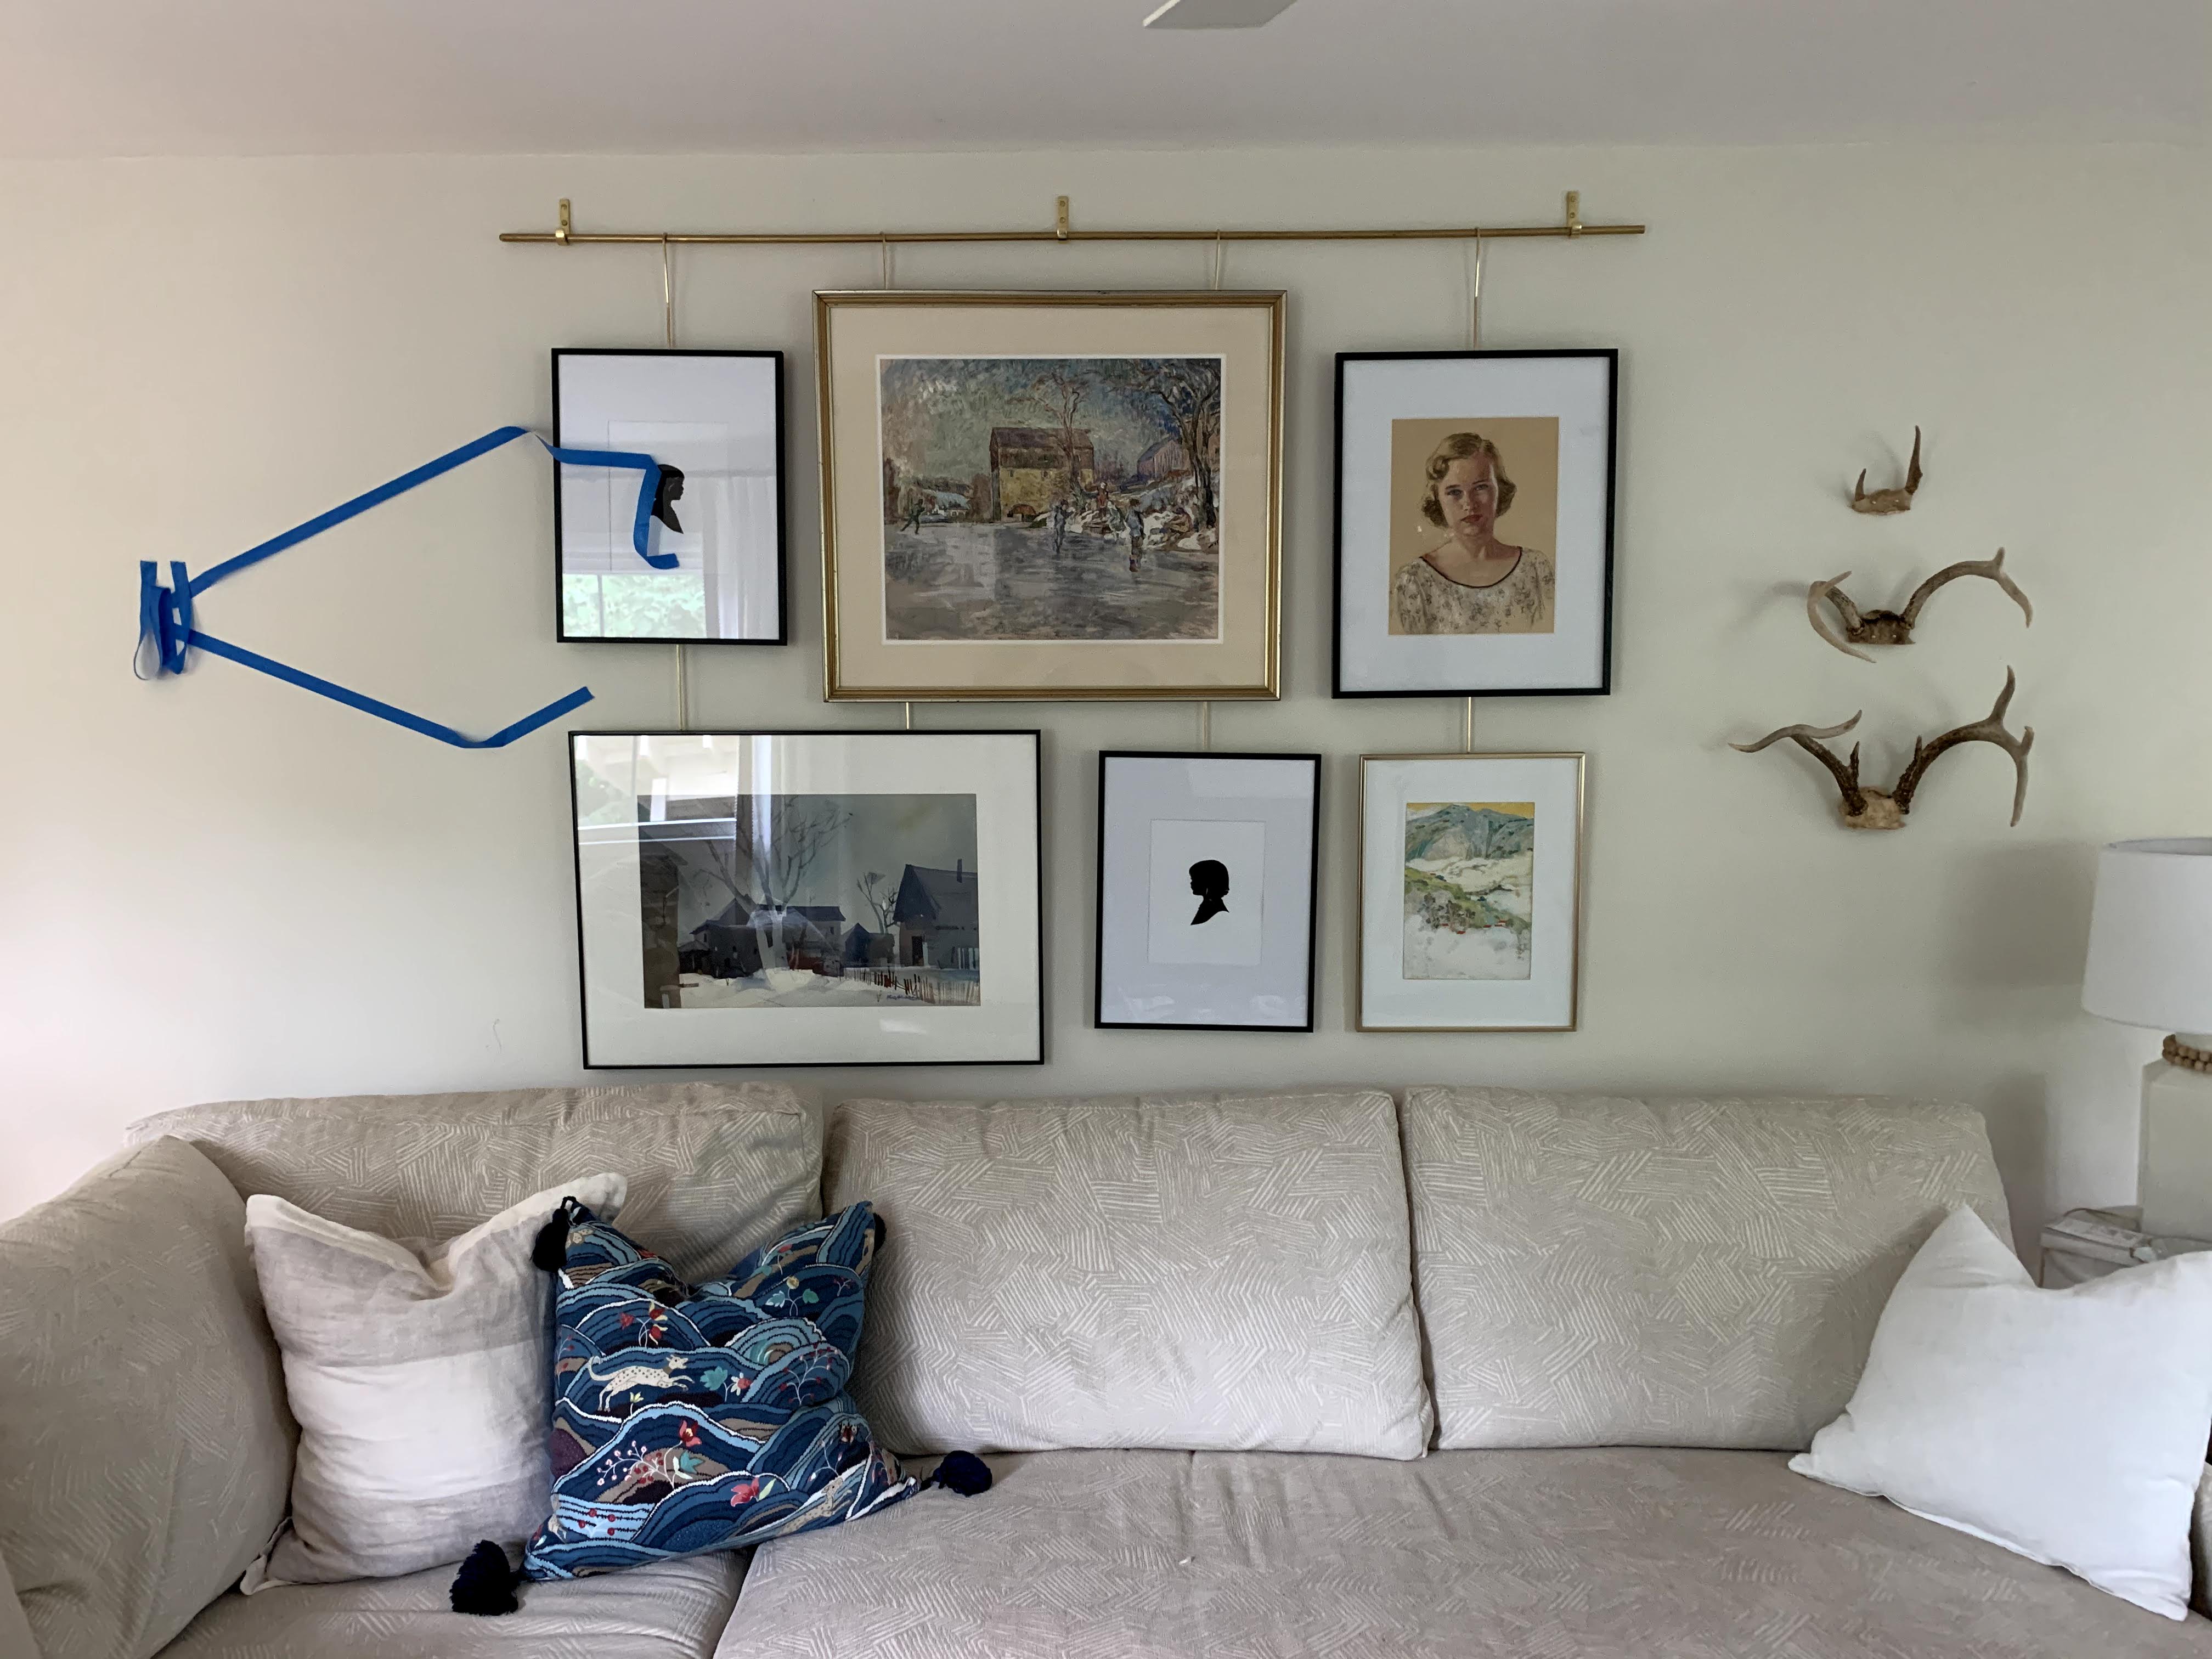 The painters tape above is a mock-up of the mantis light to come! I also hung the antlers and a few other things around the room.
I absolutely can not wait to share the final look with you guys! And I can’t wait to see all of the incredible spaces my fellow ORCers are working hard on.
Until then!

Important Links:
The media partner for this incredibly fun and inspiring event is Better Homes and Gardens.
I am linking each week below as the challenge progresses:
My current ORC Posts: Week 1: Befores | Week 2: The Plan | Week 3: The Built-Ins | Week 4: The TV | Week 5 – Paused | Week 6 – Textiles and Wall Color | Week 7 – Picture Rail – You are here! | Week 8
The Guest Participant Link-ups: Week 1 |Week 2 | Week 3| Week 4 | Week 5 | Week 6 | Week 7 | Week 8
Featured Designers for May 2020:
A Glass of Bovino | Beginning in the Middle | Beth Diana Smith | Clark + Aldine | Coco & Jack | Deeply Southern Home| Design Maze | Dwell by Cheryl | Erika Ward | Home Made by Carmona | House of Hipsters | Hunted Interior | Kandrac & Kole | Kate Pearce | Katrina Blair | Liz Kamarul | Veneer Designs| Rambling Renovators | Renovation Husbands | Studio Plumb
And, if you’d like to check out my past ORCs, those posts are here:
04.18 Powder Room: Week 1 Befores | Week 2 Wallpaper | Week 3 Mirror | Week 4 Sink Skirt | Week 5 Storage | Week 6 Reveal
10.18 Master Bedroom: Week 1: The Befores | Week 2: The Plan | Week 3: The Bed | Week 4: Lighting and Art | Week 5: The Bedding | Week 6: The Reveal
04.19 Girl’s Bedroom Week 1: The Befores | Week 2: Dresser Revamp | Week 3 – The Tent | Week 4 – the DIYs | Week 5 – The Bedding and Art | Week 6 – The Reveal