It’s time to talk about built-ins! And projectors! And failed plans! After all, what would an ORC be without a Plan B? (Or a Plan C, D, E, F…)
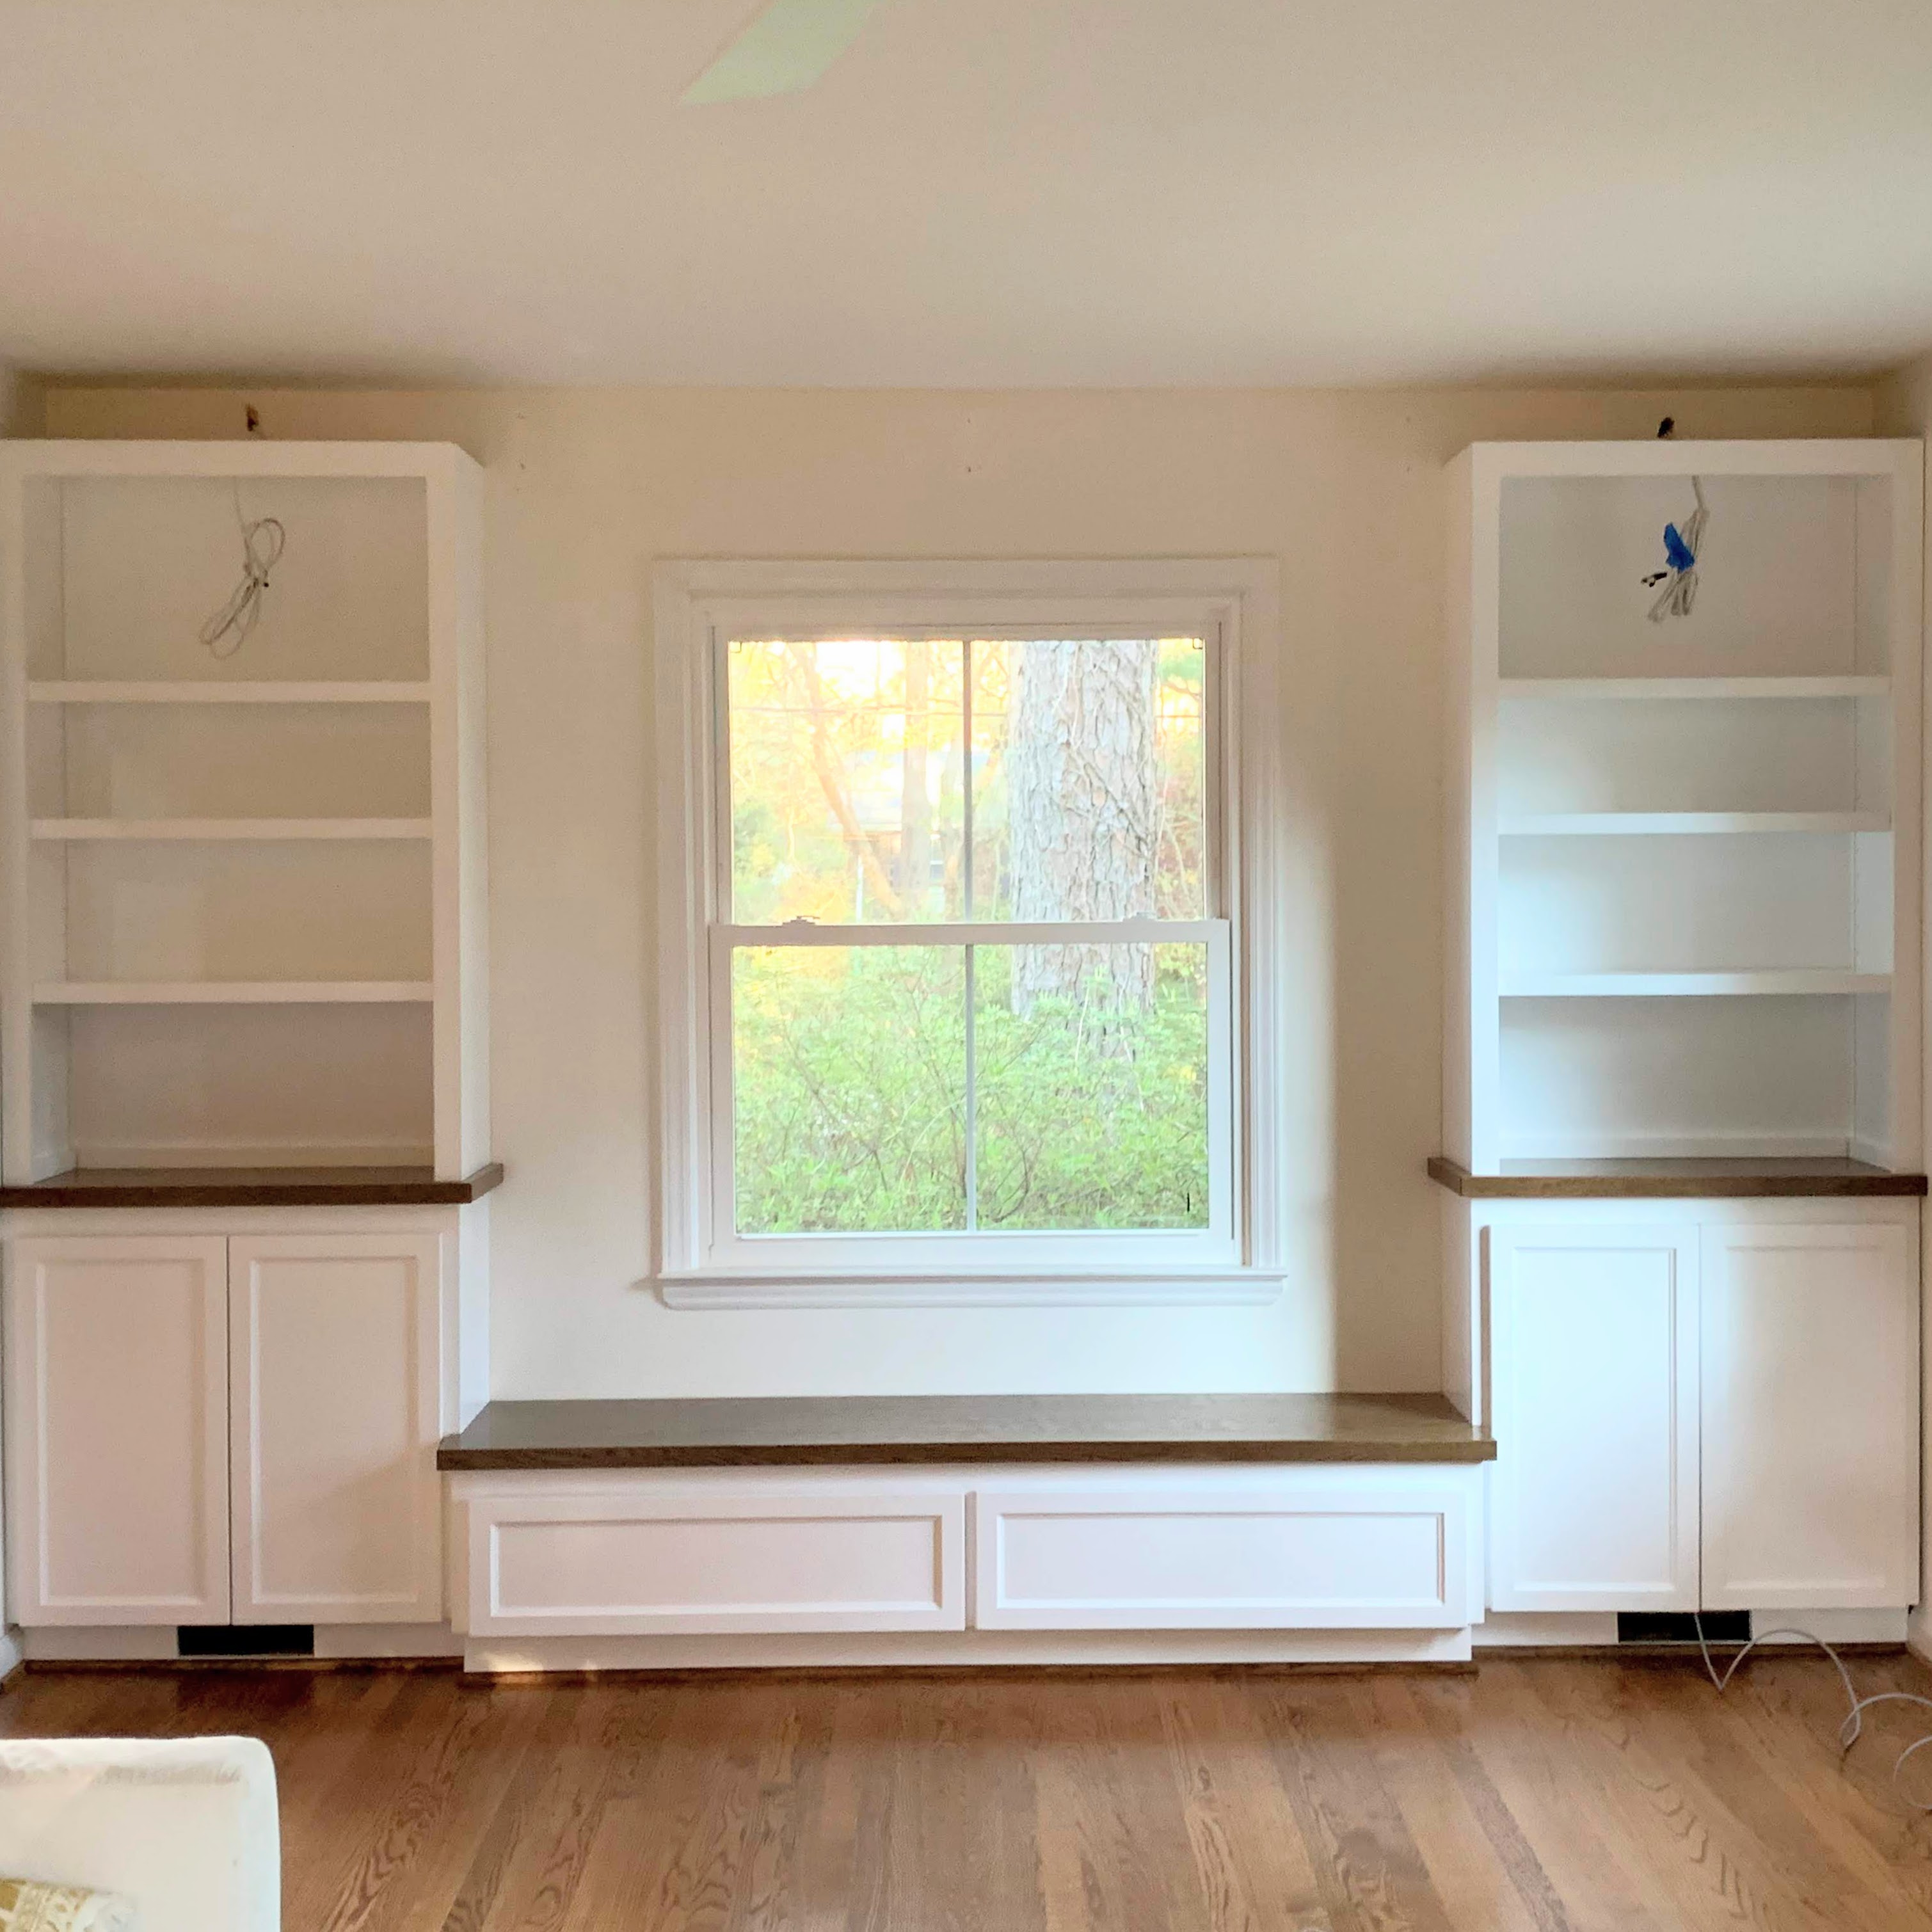
In weeks one and two, I shared that we’re working with a long, narrow living room and how I’ve struggled to find a perfect spot for the TV. Literally I have tried it in every conceivable spot. Except above the mantel. The mantel is too high, and the room is narrow for all that. We finally decided the very best spot was on the short wall near the foyer, centered on the wall. The problem is that this put it right in front of the window on the front of our house.
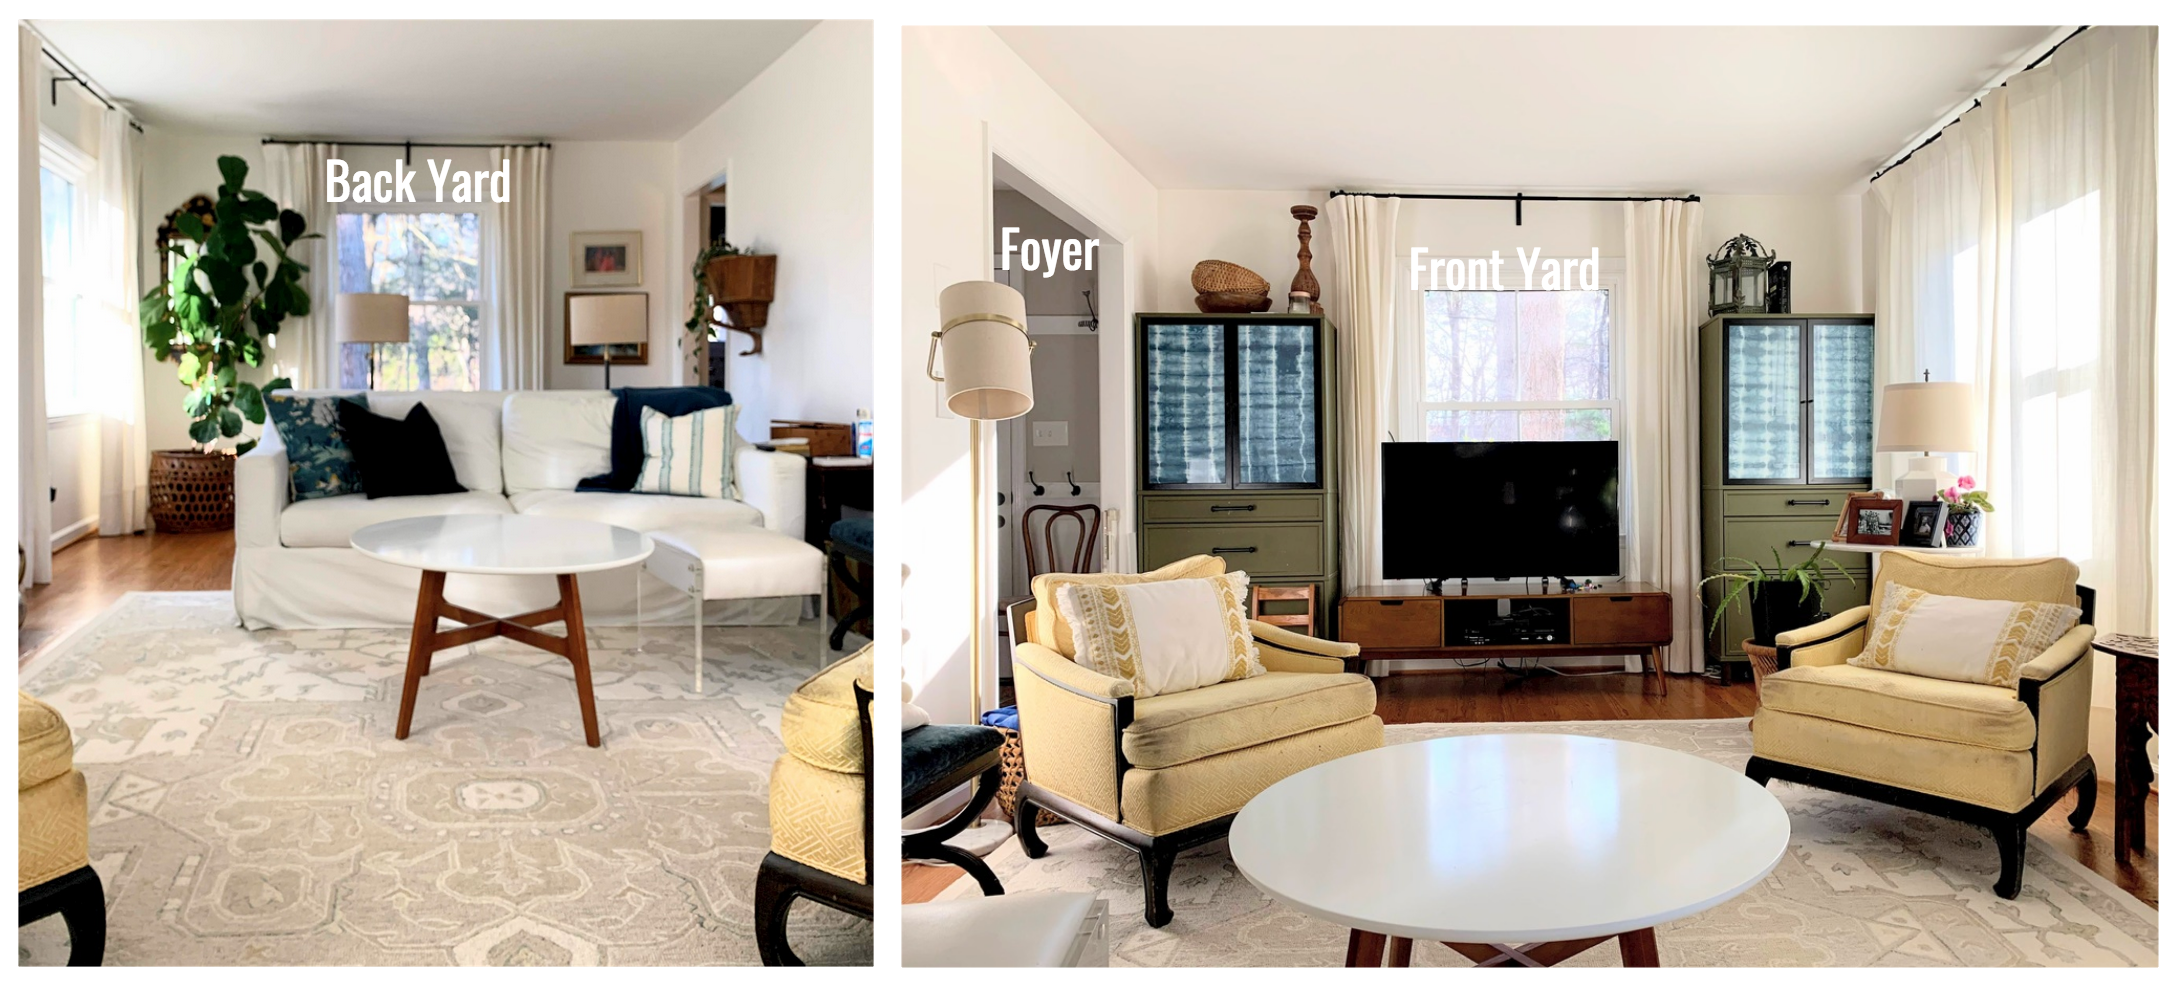 We lived with it like this for a while, but I couldn’t get over the fact that there was constantly a big black blob through the window from our front yard. I started thinking outside of the box and remembered a blog post I’d once seen. I would venture to guess you’ve also seen Emily Henderson’s gorgeous living room and the way she beautifully hid a projector and screen.

If you’re considering a projector for your home, I highly recommend dissecting Emily’s post. It’s full of super helpful info (in stark contrast to this one ? ).
The Plan
I realized we could do something similar, and design a spot within our future built-ins for the screen. The projector would be mounted from the ceiling or high on the wall opposite the room, above the desk. We could use a Roku stick to stream shows and movies, and even connect our antennae for live TV.

With the ORC start date approaching, I needed to get our carpenter started on the built-ins, so I did just that, fingers crossed this plan would work.
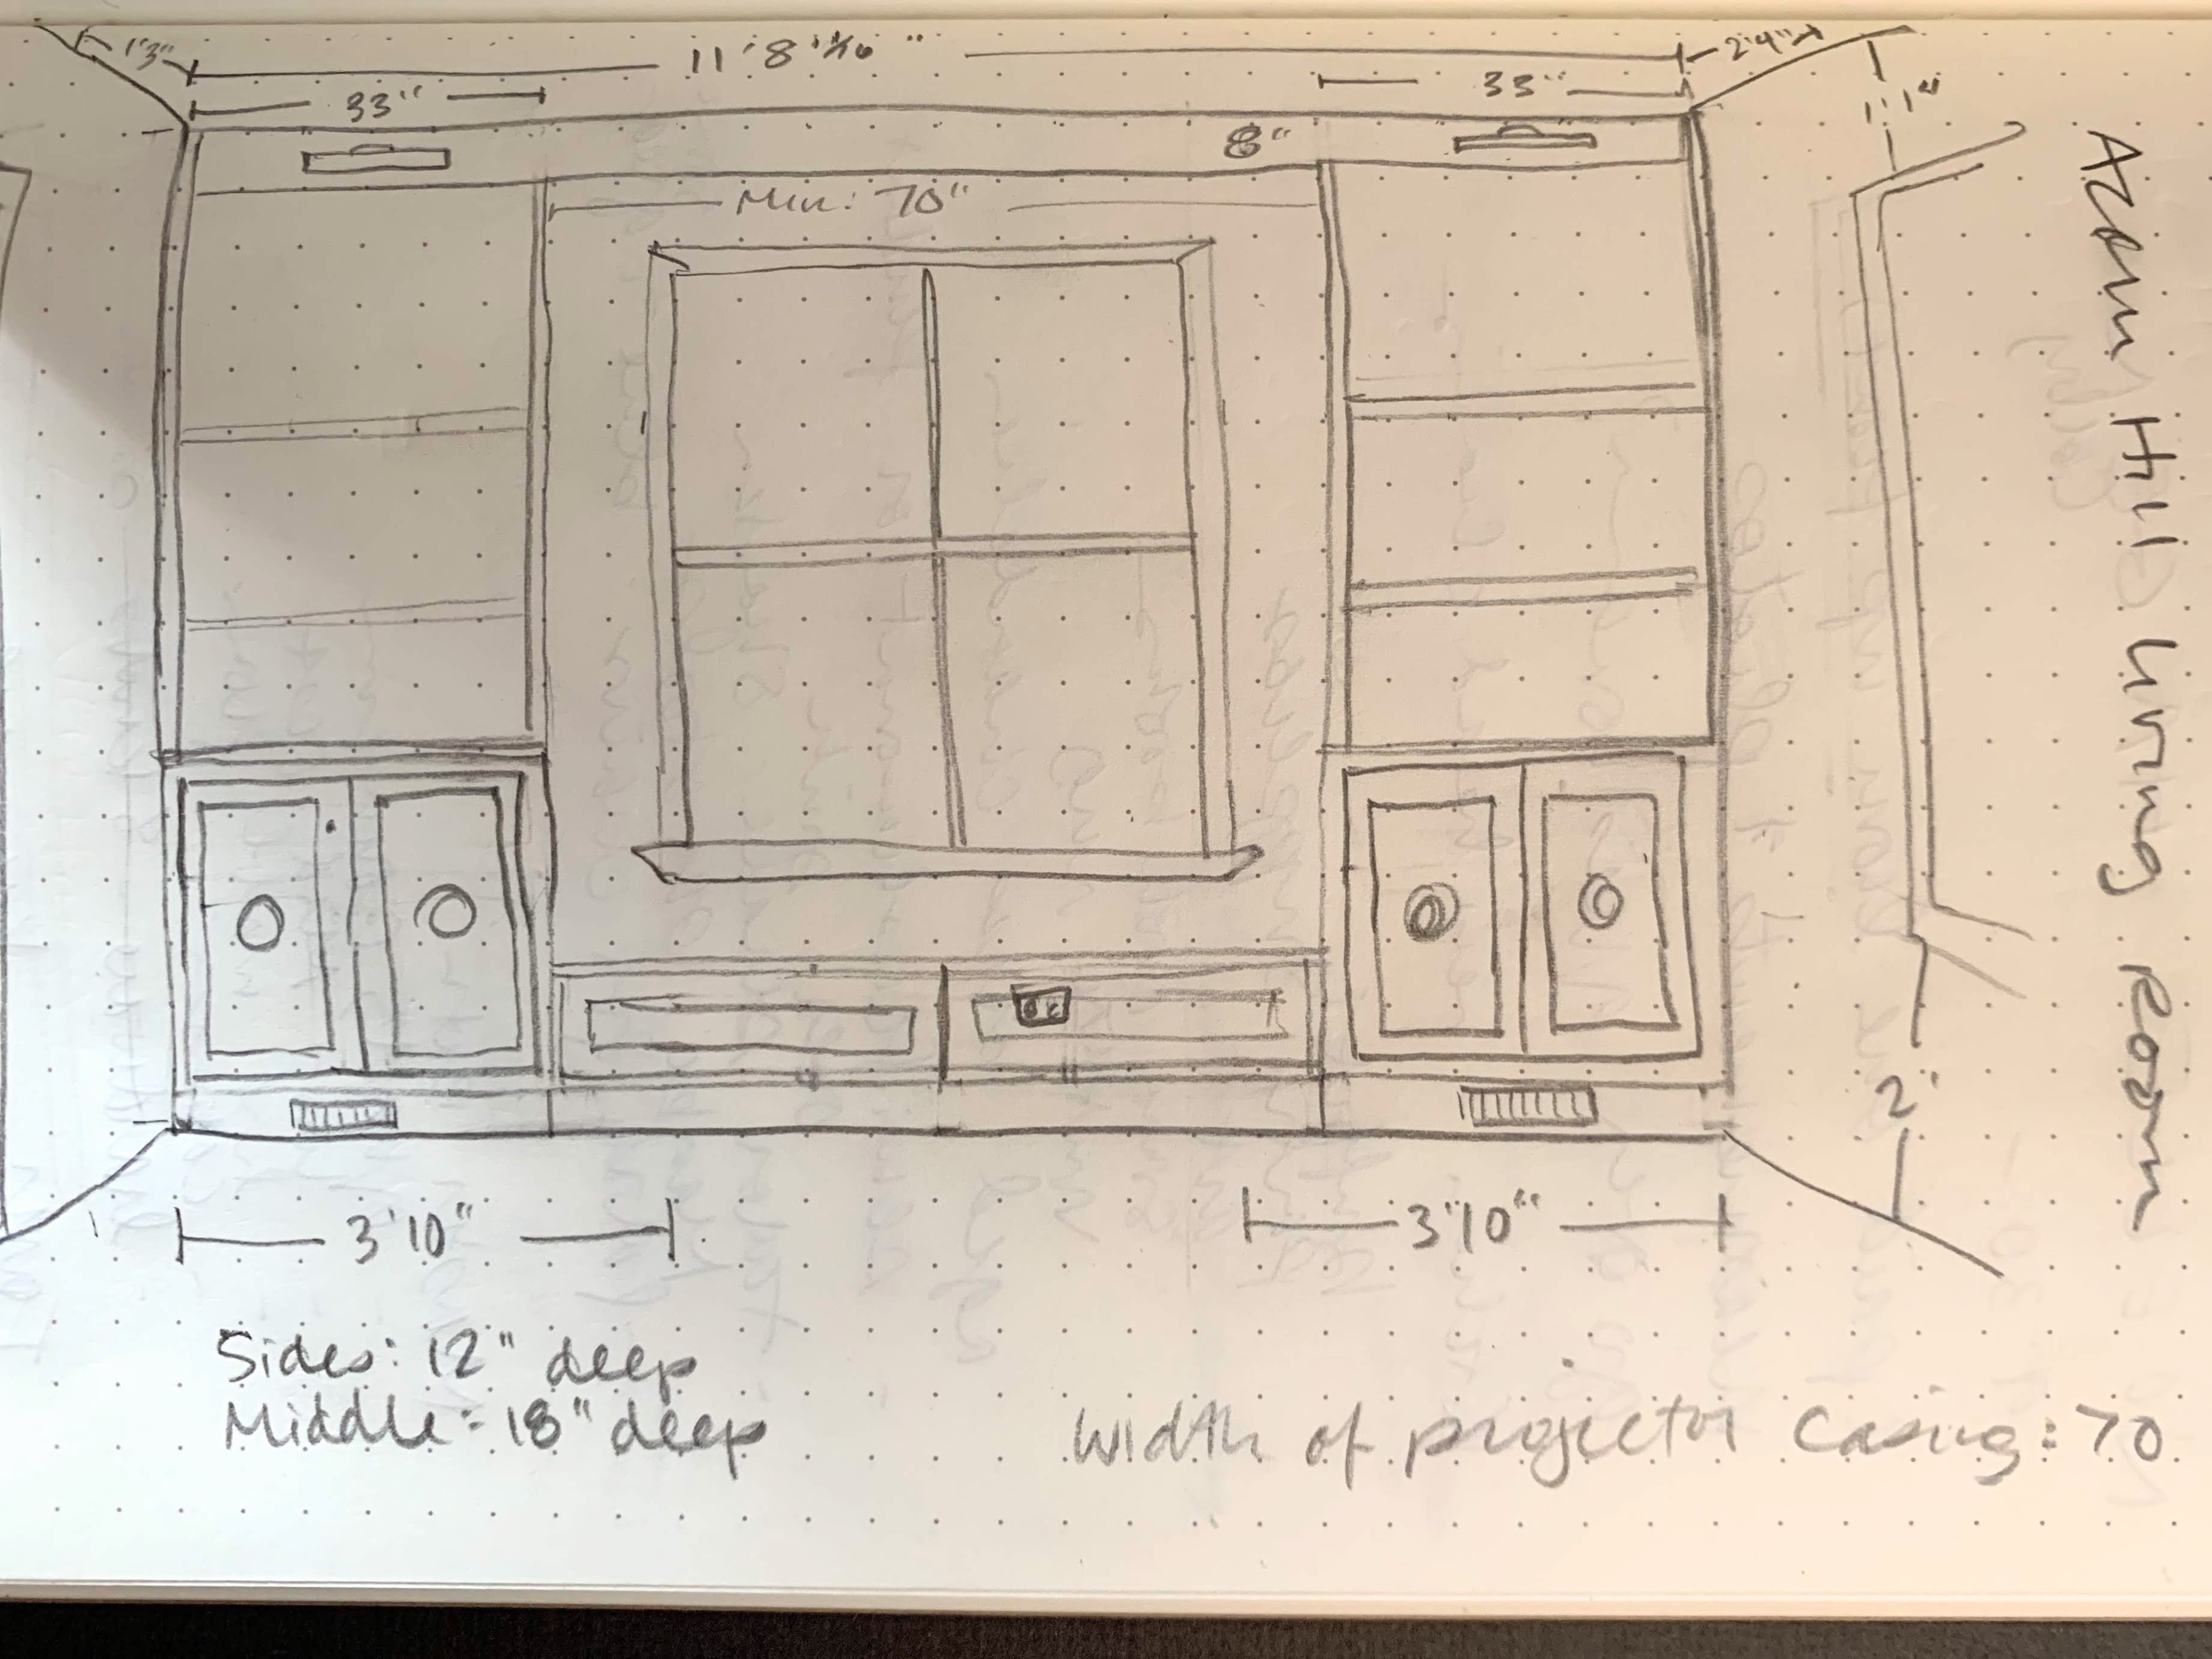
Projector research commenced, and I quickly found that there is a very wide range of pricing and capability in projectors. I discovered that the “throw distance” was an important factor. That’s the distance between the projector and the screen. Some projectors have a fixed throw distance, and some have a zoom feature that allows you to shrink or expand the image to fit your screen. My plan would require a 23′ throw distance to a screen that was about 65″ wide. I couldn’t seem to find a projector that met the specifications I needed, within our price range.
I even went so far as to consult with a local audio/visual business that designs and installs these systems in homes. The quoted me a cool $10K+ for such a setup. I was willing to pay the equivalent of a nice TV, but $10K was WAY out of our budget.
The Persistence
Undaunted, I decided to just order a projector that *might* work and give it a go. I picked this one (to pair with this screen). It had great reviews, promised a clear image, even in daylight, and would “throw” 23′. To see if it would work, I needed to get the projector in place. Here’s the temporary setup (if this worked, I would have hidden the cords).
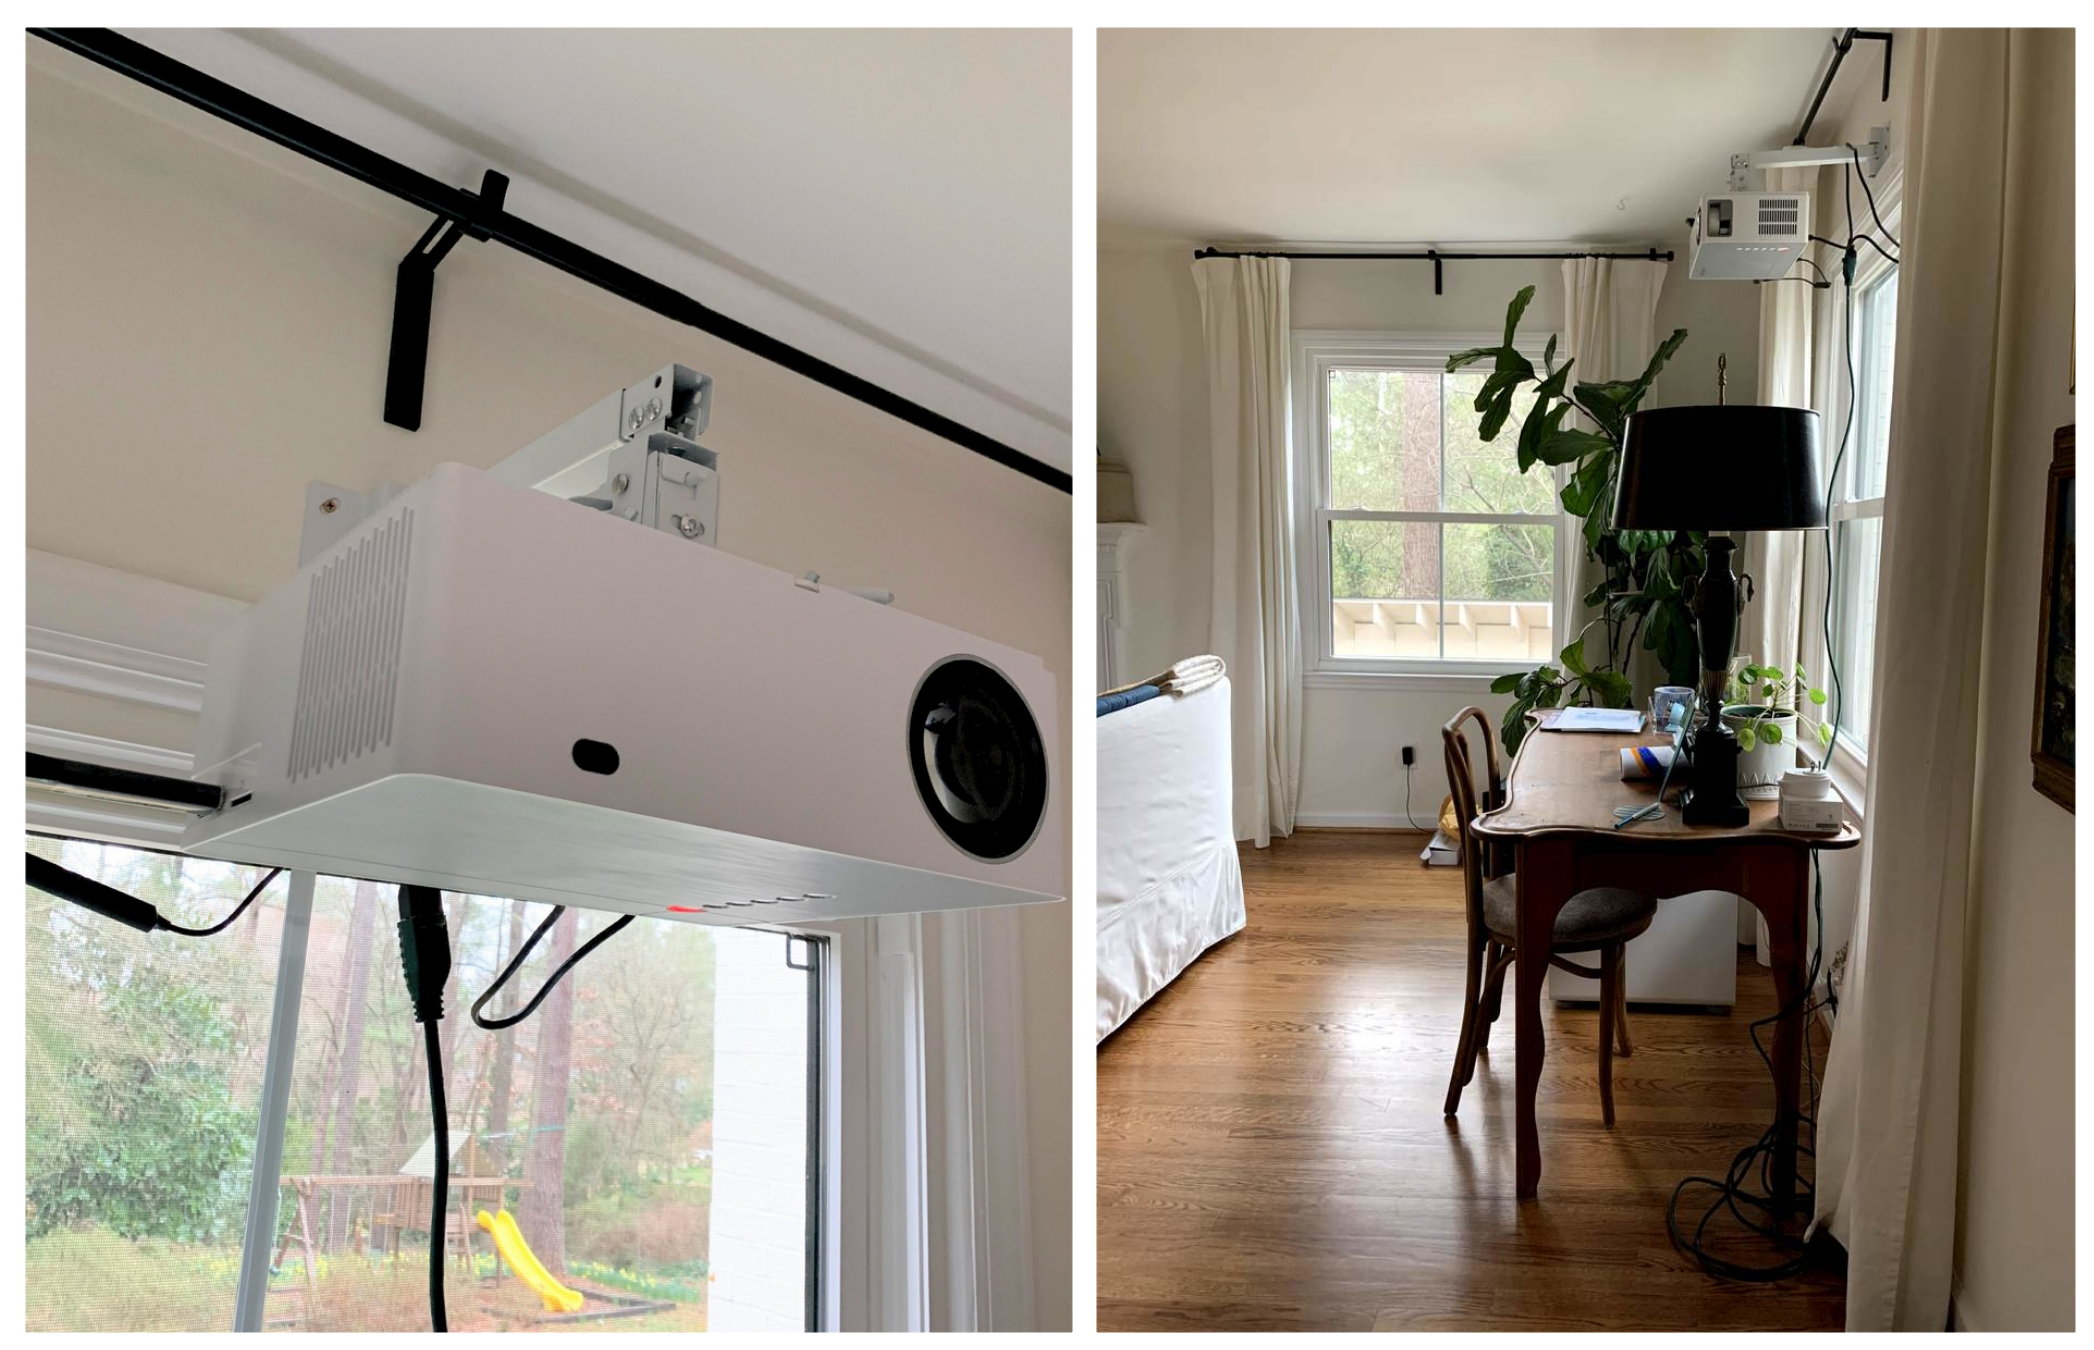
Welp, when I turned it on, it did in fact project on the far wall. The problem was that the image was too big. Way too big. Larger, in fact, than the wall itself. Even by adjusting the image size, the projector was way too far from the wall/screen to work. I didn’t even bother to set up the screen.
Don’t you know I considered all of the options…get a pricier, smaller/more streamlined projector and move it closer, build one into the ceiling, utilize a drop-down box, use a ultra short-throw projector right up against the screen, etc etc etc. Extensive research followed, all of which led me to conclude a projector was not the solution in this room (for less than $10K). [insert cry-face emoji here]
I packed up the projector, returned it, and started brainstorming alternative solutions. More on that next week!
The Built-Ins
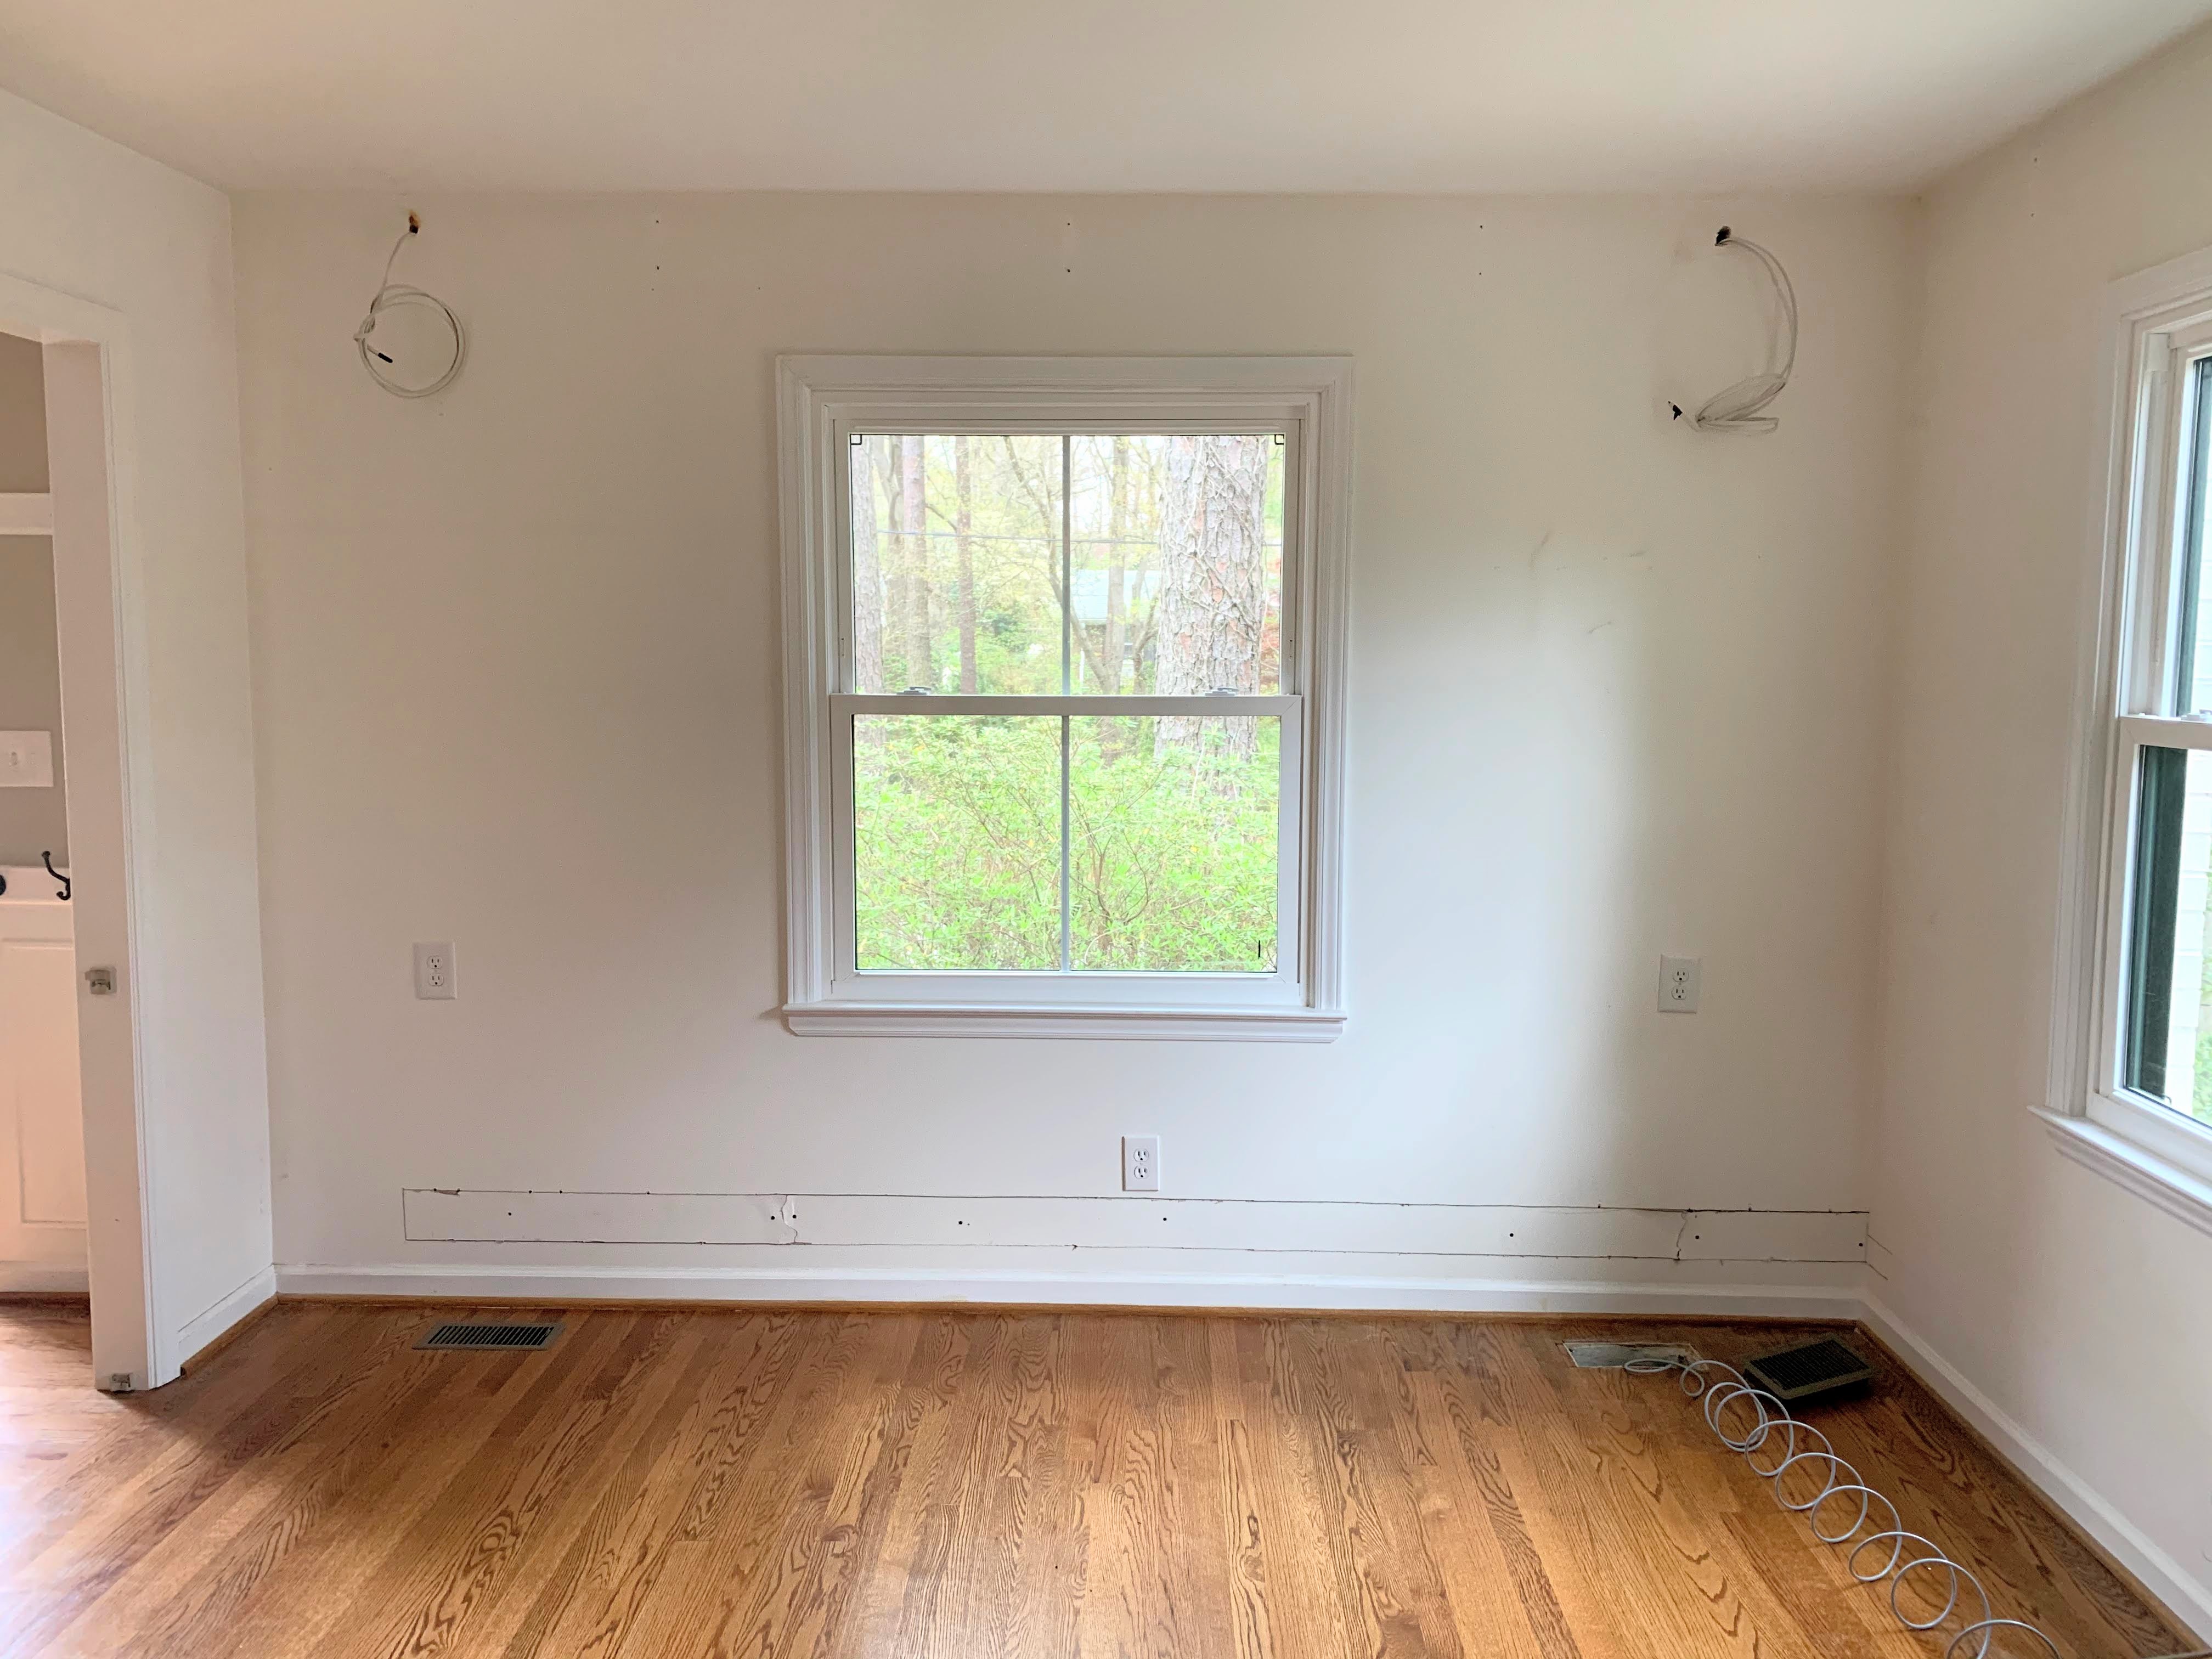
Meanwhile, the built-ins were to arrive shortly, and we needed to get the electrical sorted before install. Our electrician came out and wired outlets that would be hidden within the cabinets. He ran electrical for the sconce lights at the top of the bookshelves. Check check.
Then the glorious day arrived for the install. Mind you, I’ve been dreaming of built-ins for this room since we bought this house. For us, this was a huge upgrade and huge splurge (and to not have to do it ourselves was a REAL treat!).
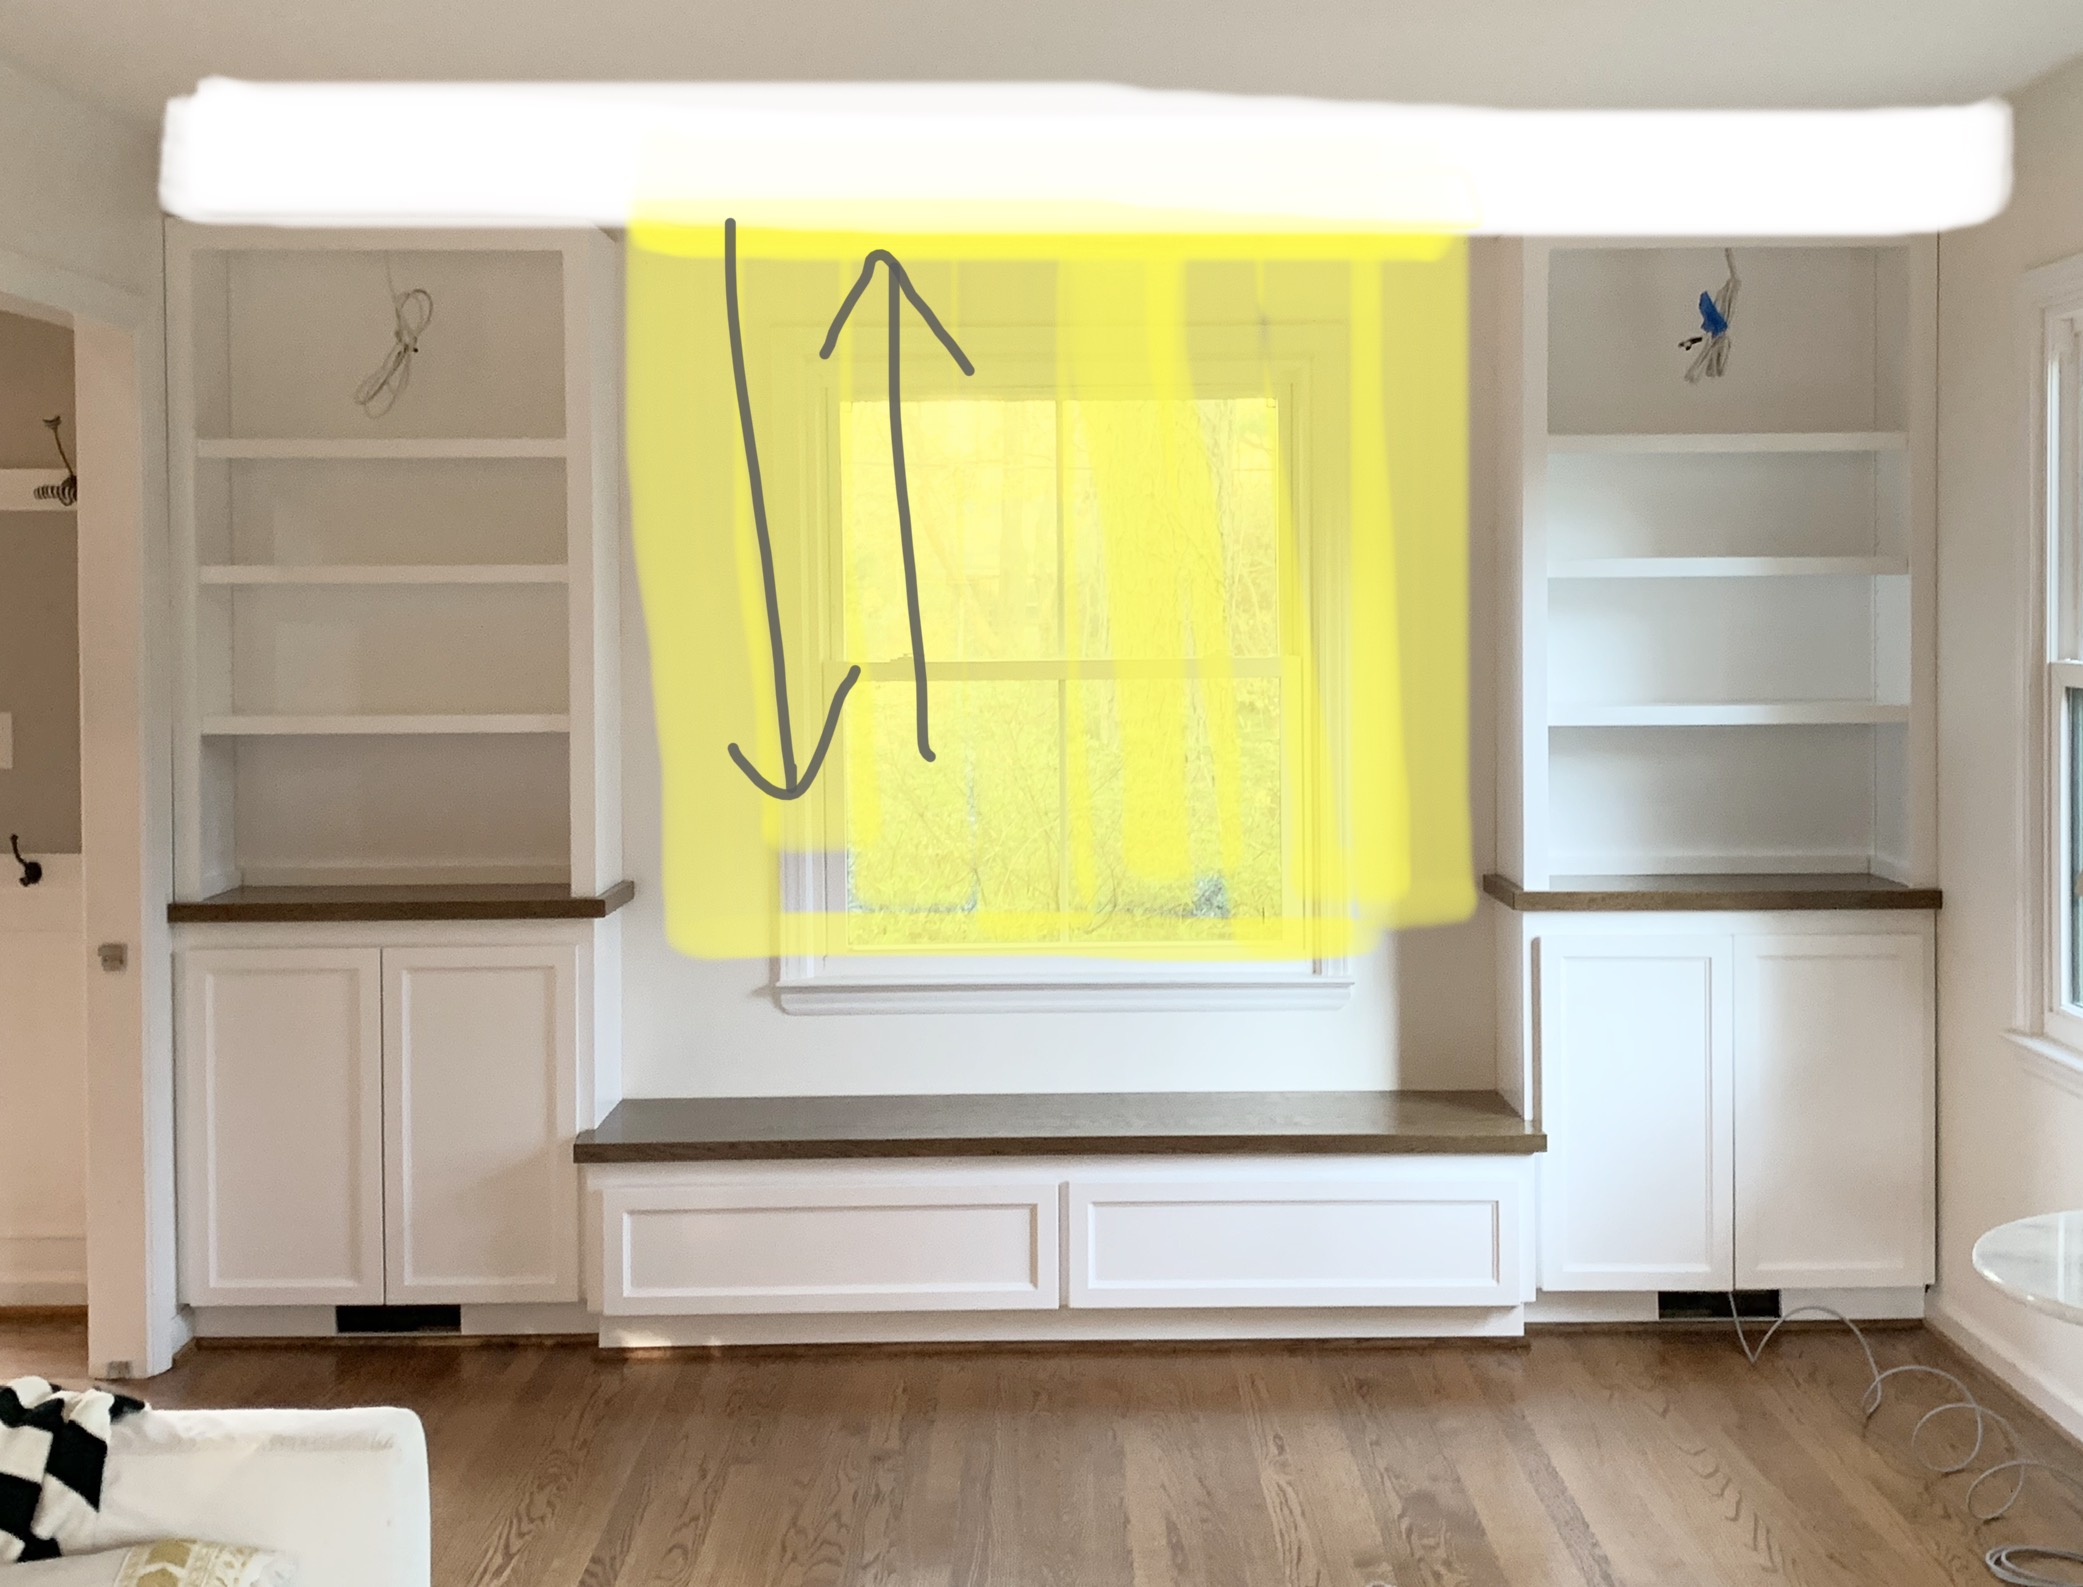
With Plan A (projector success), a soffit-like board would have crossed the entire front of the unit at the top, hiding those empty spaces, as well as the projector screen. Kinda like this…
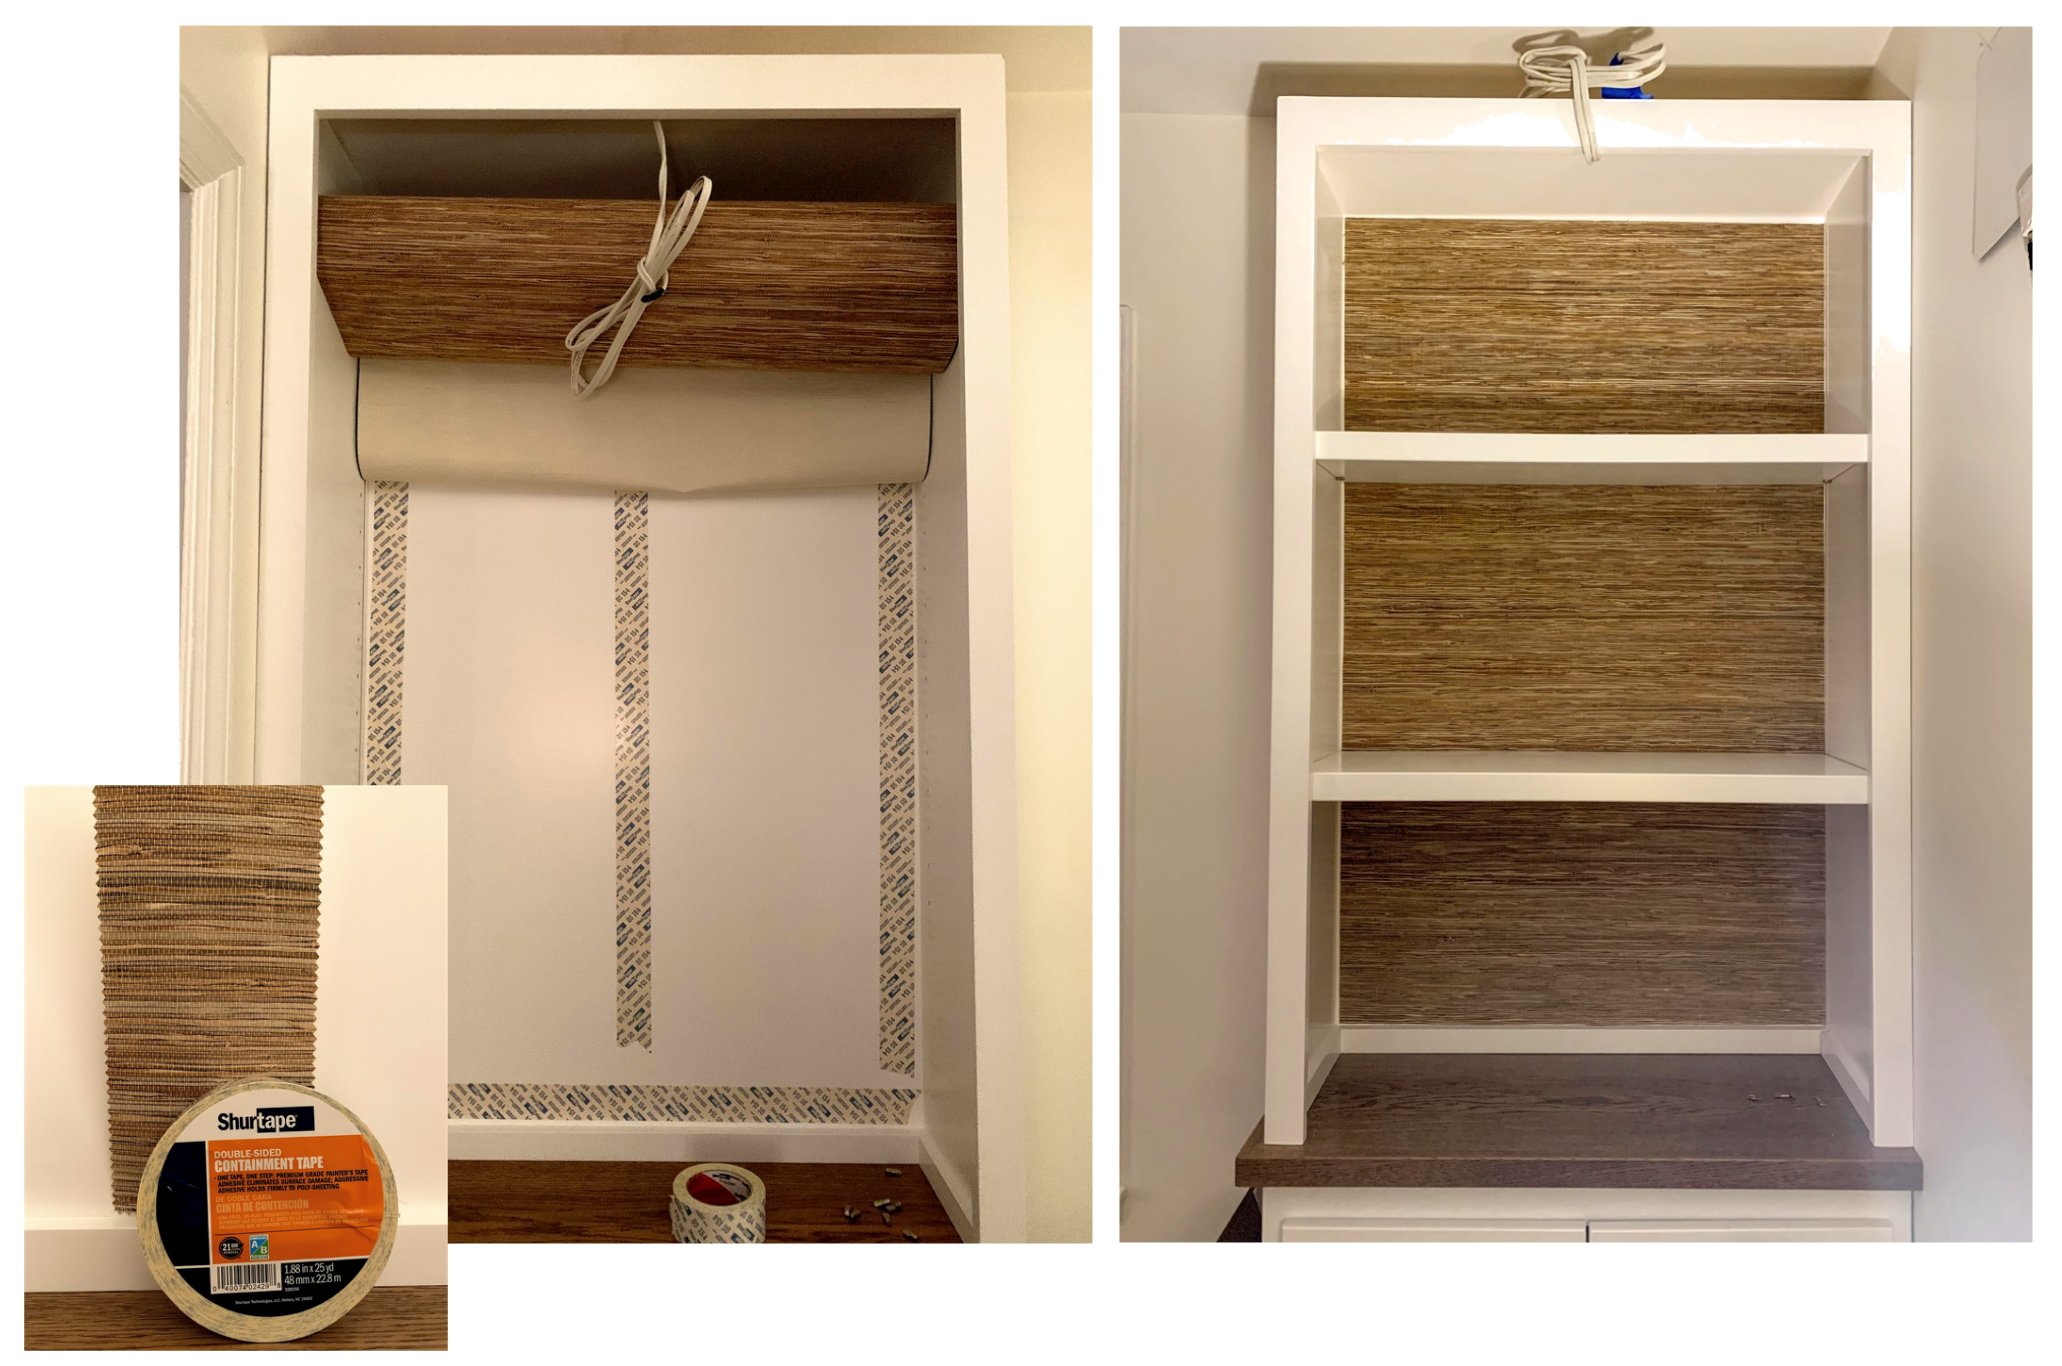
Ah, vel. Turns out it was all for the best. Can’t wait to share more on our final solution. Before I leave you, I’ll also give you a peek at the wallpaper I used in the back of the shelves. It’s a yummy, textural grass cloth. Rather than install it with wallpaper paste, I used this double-sided removable tape. I’m in love with the texture and depth the paper brings!

Important Links:
The media partner for this incredibly fun and inspiring event is Better Homes and Gardens.
I am linking each week below as the challenge progresses:
My current ORC Posts: Week 1: Befores | Week 2: The Plan | Week 3: The Built-Ins – You are here!
The Guest Participant Link-ups: Week 1 |Week 2 | Week 3
Featured Designers for May 2020:
A Glass of Bovino | Beginning in the Middle | Beth Diana Smith | Clark + Aldine | Coco & Jack | Deeply Southern Home| Design Maze | Dwell by Cheryl | Erika Ward | Home Made by Carmona | House of Hipsters | Hunted Interior | Kandrac & Kole | Kate Pearce | Katrina Blair | Liz Kamarul | Veneer Designs| Rambling Renovators | Renovation Husbands | Studio Plumb
And, if you’d like to check out my past ORCs, those posts are here:
04.18 Powder Room: Week 1 Befores | Week 2 Wallpaper | Week 3 Mirror | Week 4 Sink Skirt | Week 5 Storage | Week 6 Reveal
10.18 Master Bedroom: Week 1: The Befores | Week 2: The Plan | Week 3: The Bed | Week 4: Lighting and Art | Week 5: The Bedding | Week 6: The Reveal
04.19 Girl’s Bedroom Week 1: The Befores | Week 2: Dresser Revamp | Week 3 – The Tent | Week 4 – the DIYs | Week 5 – The Bedding and Art | Week 6 – The Reveal