It’s week two of the One Room Challenge, and just I realized I neglected to introduce myself last week. If you’re new around here, I’m Cate and I’m a designer in Raleigh, NC. I’m decorating my 8 year old daughter’s bedroom as part of the biannual One Room Challenge. For this 6 week event, I post my progress each Wednesday night, and at the bottom of each post you can see lots of relevant links and info.
I have to admit I’m feeling a teeny bit overwhelmed and maybe a bit paralyzed by the volume of what I need (want) to do and a bit of doubt that it will turn out as I hope it will – and on time. This sometimes happens in the design process, but it seems ever more likely when it’s my own home in flux.
This week my big self-prescribed projects were to revamp the inherited dresser, paint the walls, rearrange, and hone in on a plan for the rest of the items. Let’s start with the dresser.
Do you have furniture that was lovingly handed down to you, but doesn’t really fit your “style profile”? I know I’m not the only one. Don’t get me wrong…I am so very grateful to have inherited meaningful, beautifully made pieces. They just don’t always fit our little family’s style.
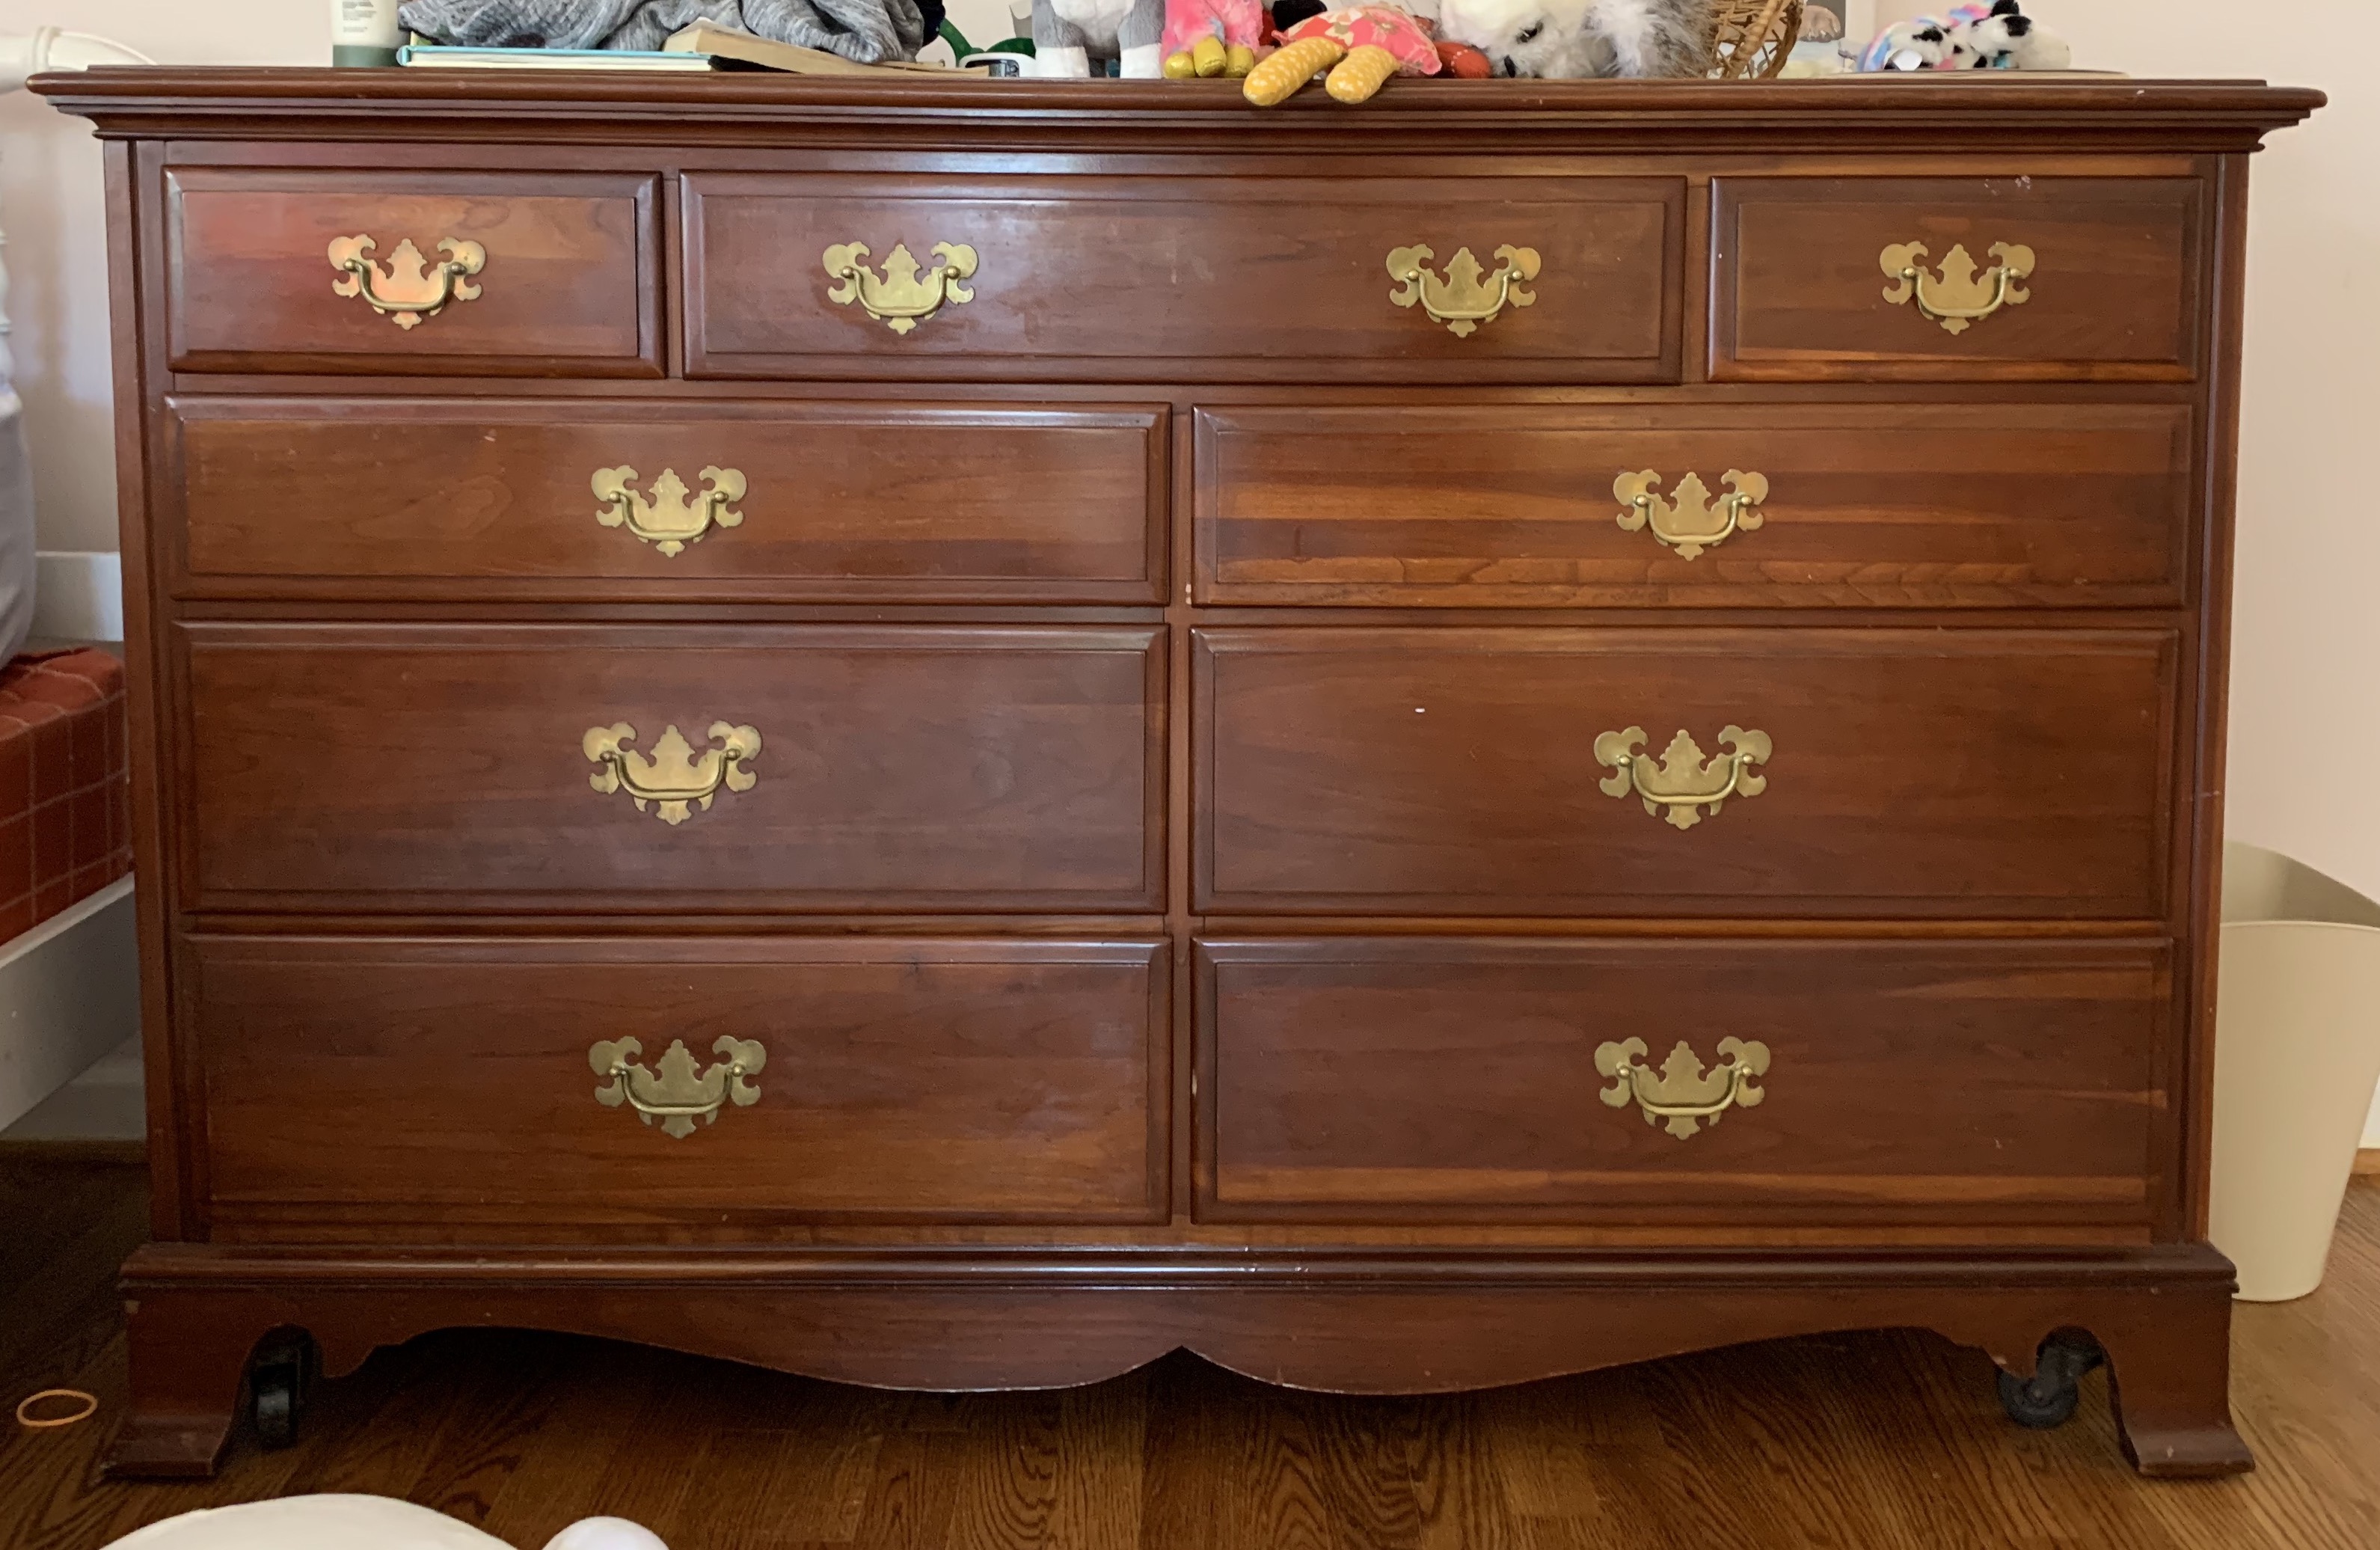
It used to be that my immediate solution to changing a piece I didn’t love was to paint it. I’d like to think I’ve evolved a bit, and I can more deeply appreciate the varied tones and textures in old wood. This beauty was part of a bedroom suit that belonged to my grandparents.

It’s a bit “fancy” for my own personal taste, and I wondered if I could tone it down some by stripping off the poly finish, softening the redness of the wood, giving it a more matte (but still sealed) finish, and replacing the pulls.
I’ll tell you, it took quite a bit of elbow grease, but I managed to make it happen, and I have to say I’m loving the piece so much more! Let me share what I did…

First: Remove Finish
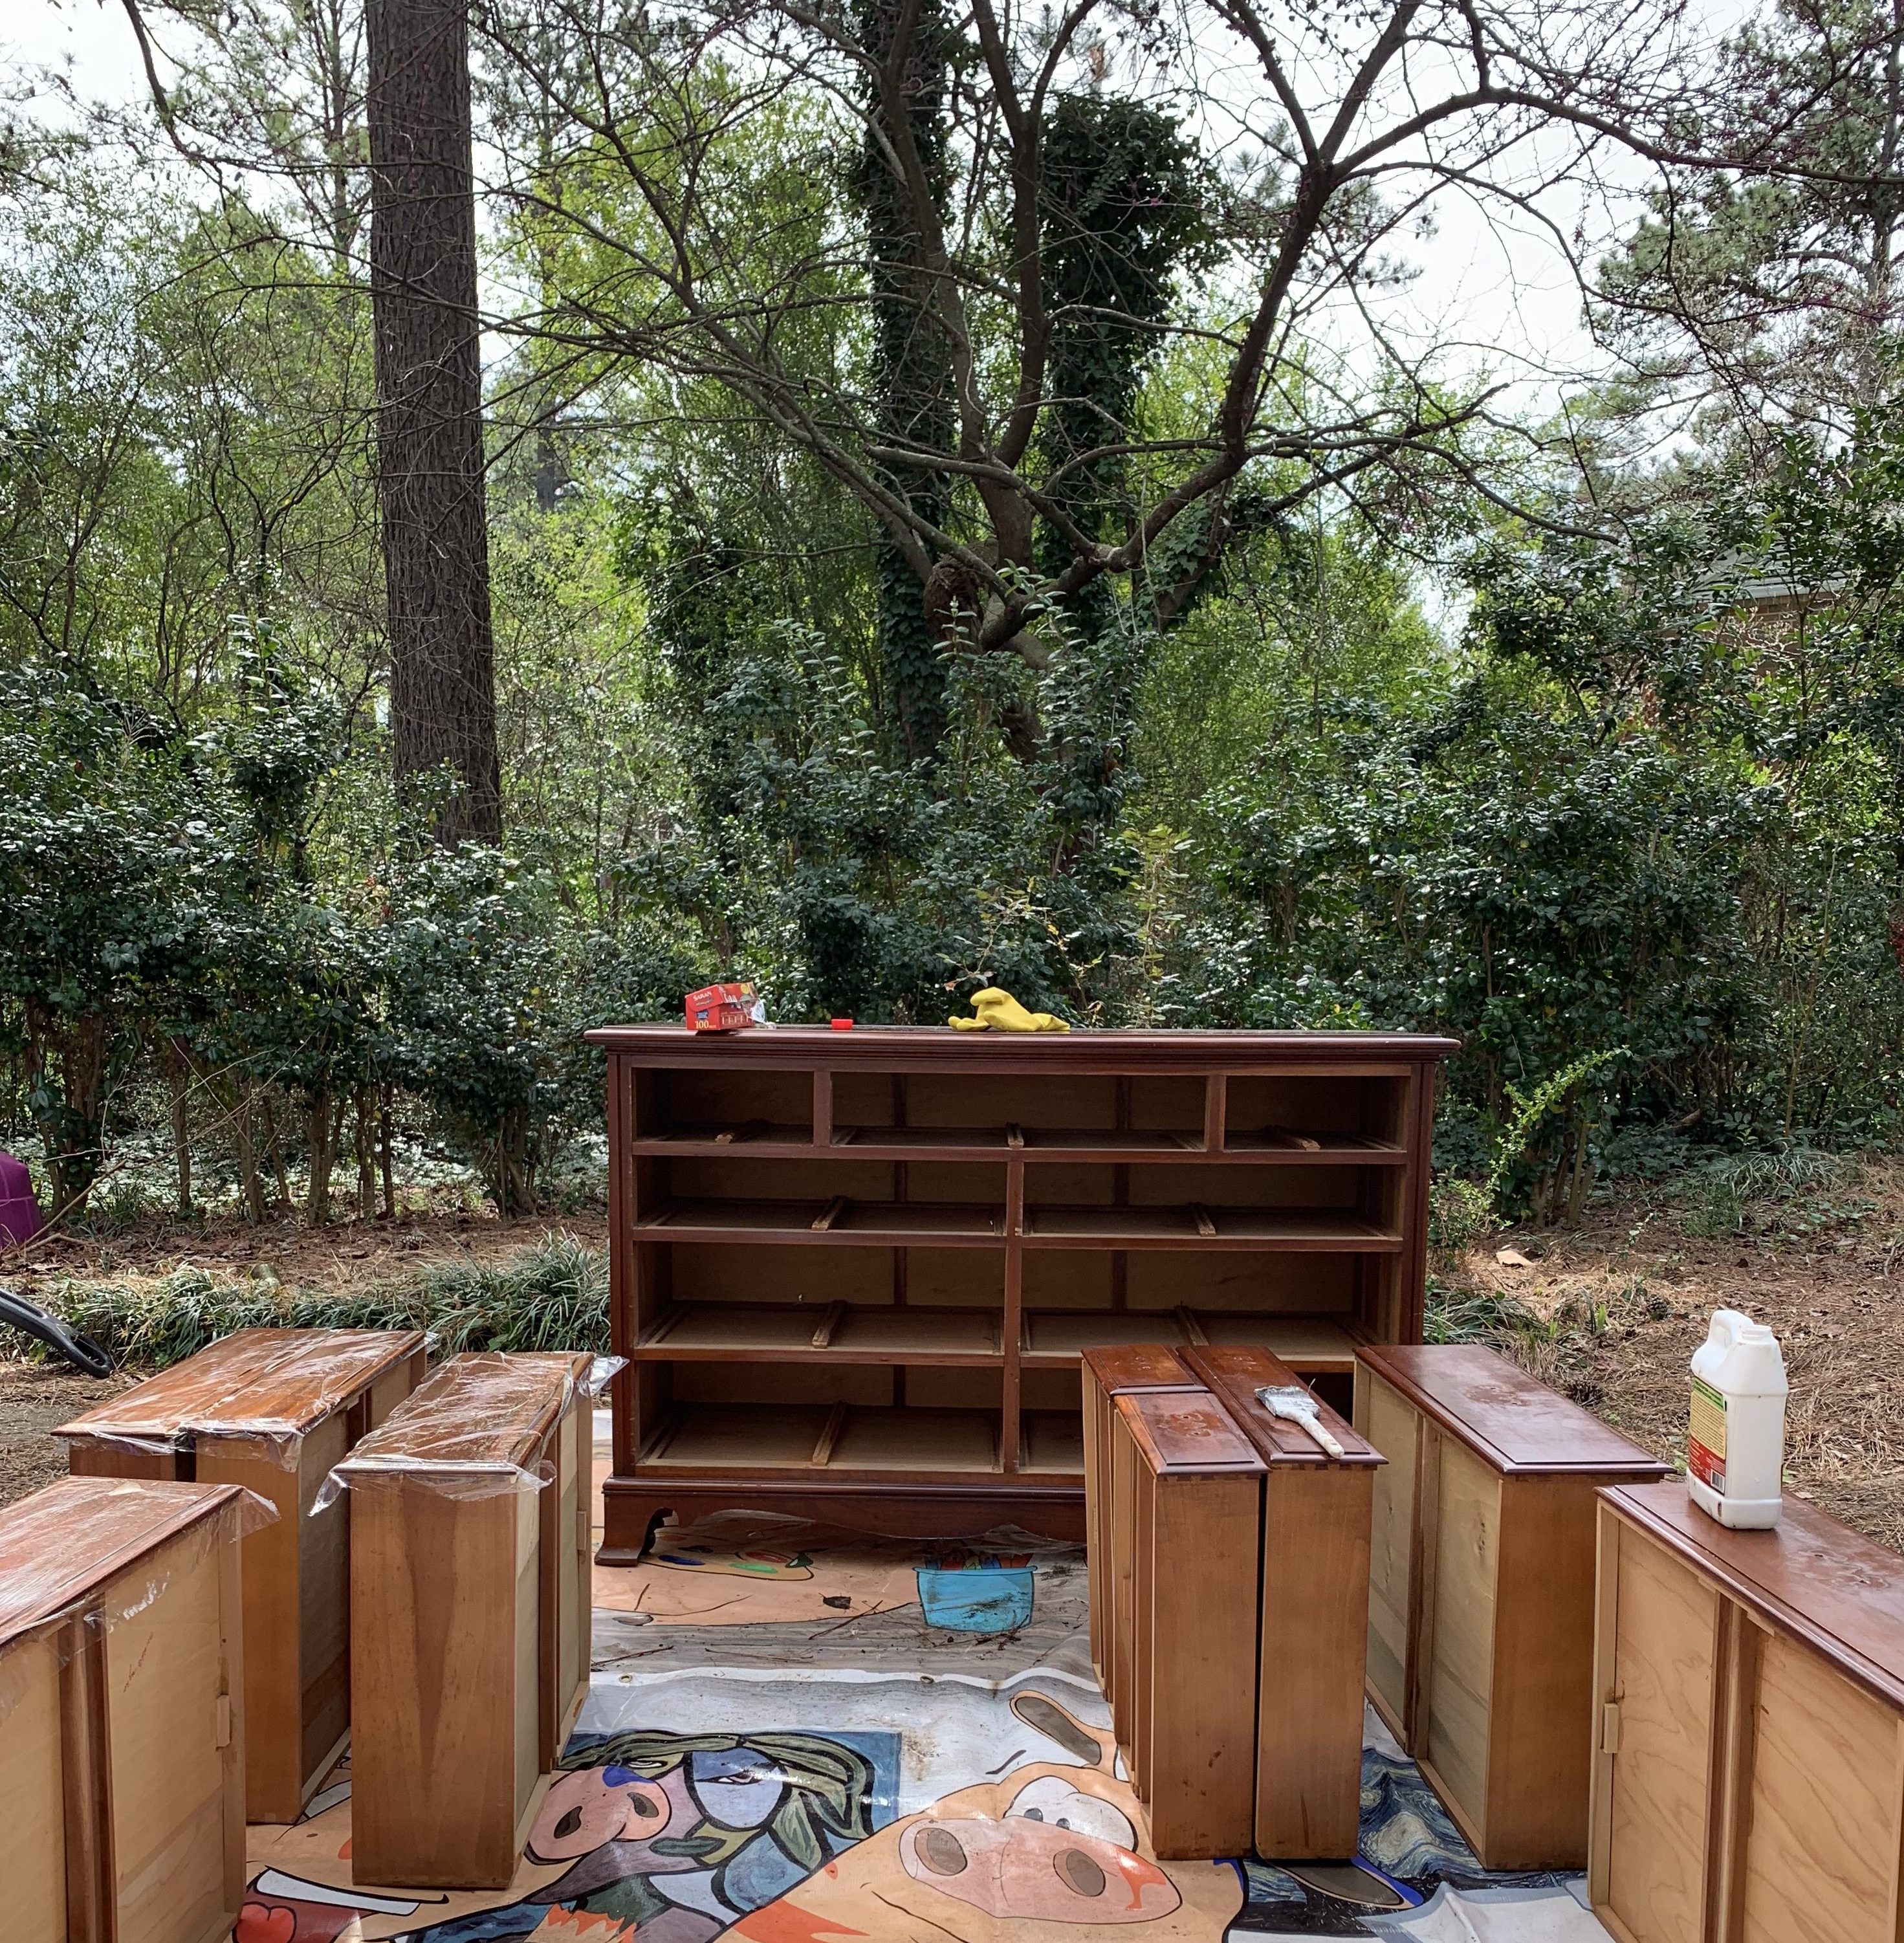
I removed all of the hardware and wiped the whole thing down. I painted a thick coat of EZ Strip on the surfaces and let it sit for a few hours (per the label instructions). You can see from the photo I experimented a bit with plastic wrap on the drawer fronts. I had read that could help speed up the process. Honestly, I’m not sure it made much of a difference.
It took a few rounds of coating the pieces, letting them sit for a few hours, and scraping the sludge off with a drywall spatula. PRO TIP: since the flat scrapers won’t get into the small nooks and curves, I found that pouring some EZ Strip onto a stiff scrub brush, and scrubbing those places did a great job at removing the old poly there. Once I had most of the finish off, I wiped everything down with a wet rag.
When the wood was all dry, I used Durham’s Water Putty to fill the holes. This stuff is so strong and easy to use (and will only cost you a couple of bucks).
Second: Sand
I let the pieces dry for a few days, then sanded everything down. I used our orbital sander, but a palm sander or even a sanding block could work. This got all remaining poly off and smoothed everything out.
Third: Stain
I knew I wanted a really matte, flat finish, so I chose a stain with no sealant or poly. I also wanted to counteract some of the inherent red tones in the cherry wood, so I chose to mix two stain colors together, Dark Walnut and Weathered Gray.
I tested a few stain combos on the inside of a drawer front and settled on a 1:1 ratio of the two colors. I simply wiped it on with a rag and removed excess, as the directions stated.
Fourth: Seal
Unsealed wood will absorb stains easily, even oils from fingertips, so even though I wanted a flat finish, I still needed to protect the wood. I went with a Danish Oil in natural finish, and it did the trick!
And, there you have it, folks! I added some cute new pulls from Anthro and called it done!

For the wall color, I went with one of my favorite neutrals, Natural Cream by Benjamin Moore. It’s been a few years since I’ve painted a room, and I’d forgotten how satisfying rolling that new fresh color is. It took me less time than I’d planned (bonus!) and makes such a nice impact.
I’ve ordered custom woven wood window shades and picked out a night stand that will function better for Elsie. I’ve started a source list at the bottom of these posts, and it will grow as the project progresses.
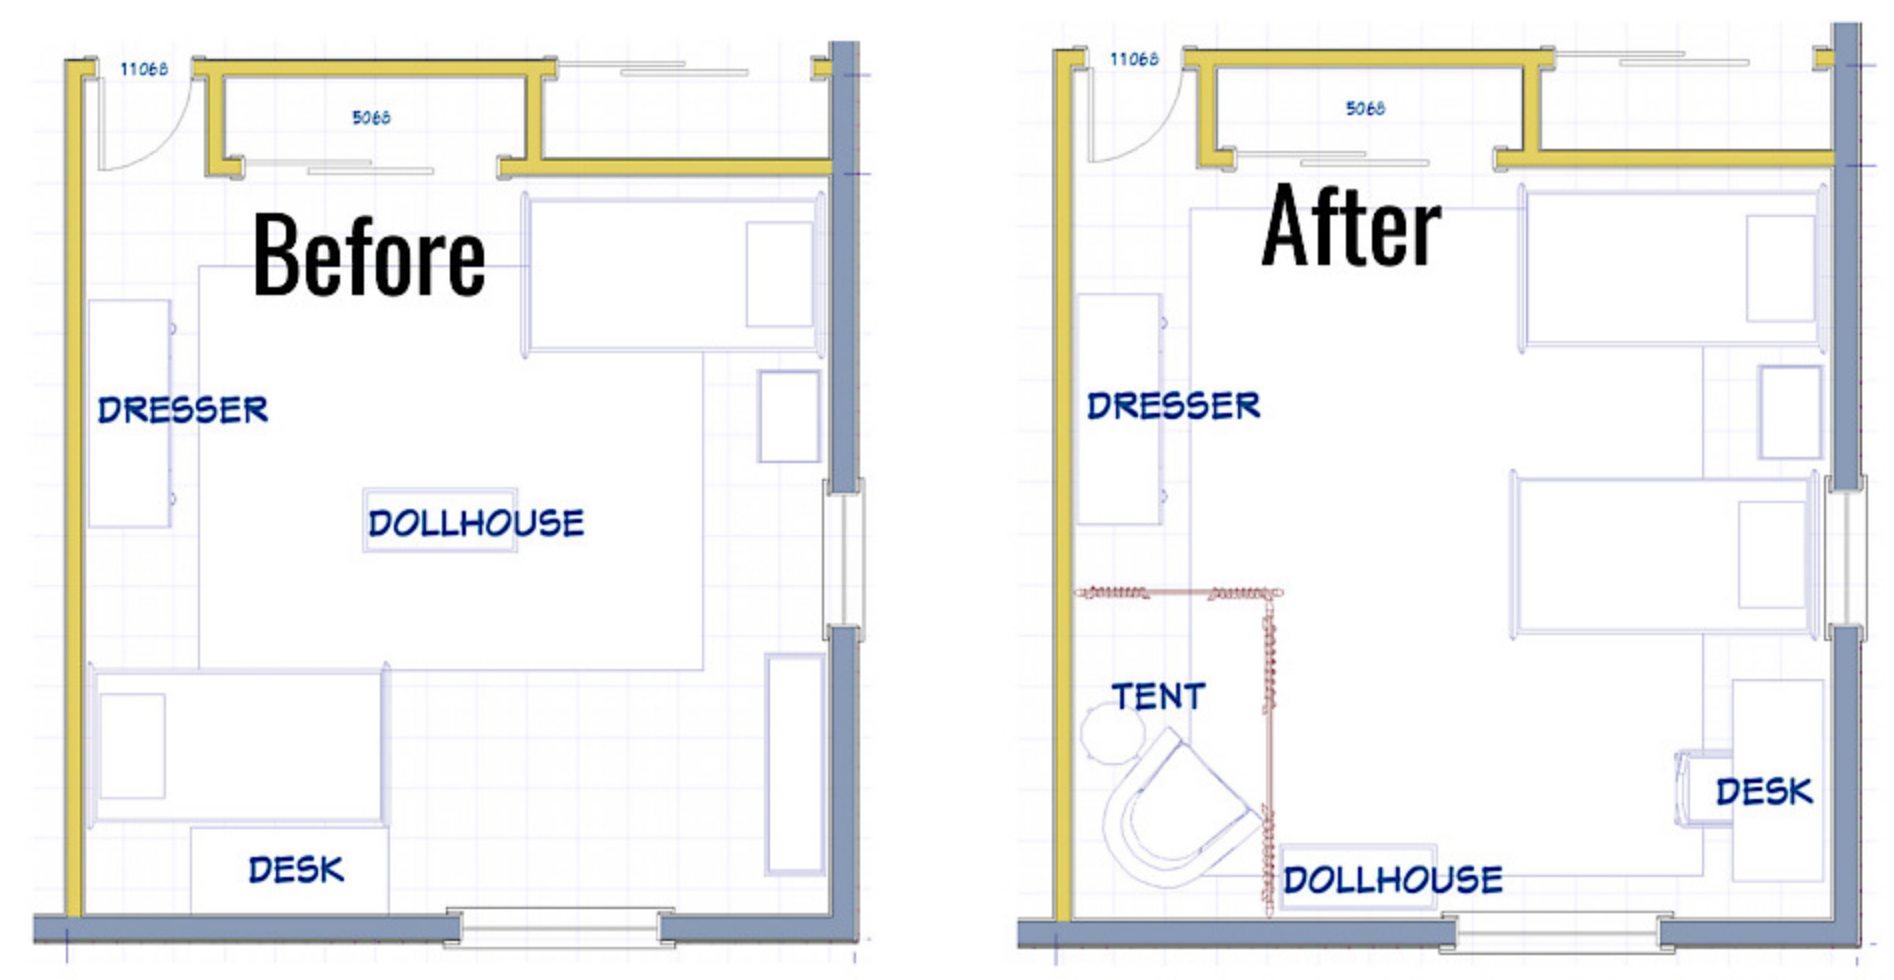
The furniture is now moved into place, and the room is starting to feel a bit more balanced.

Now, for our updated to-dos…
organize/purgerearrangerefinish dresserprep and paint walls- make tent + get comfy seating
- get bedding
- get rug
get window treatments- get wall art
- get mirror
get bedside table- storage/toy solution
- get lamps
Looks like somebody needs to get shopping!
Source List So Far
- Dresser Pulls
- Wall Color: Benjamin Moore Natural Cream OC-14
- Vintage Beds (similar)
- Desk (similar)
- Woven Shades in Cape Cod Sand
- Bedside Table
(affiliate links above)
Important Links:
The media sponsor for this incredibly fun and inspiring event is Better Homes and Gardens.
I am linking each week below as the challenge progresses:
My current ORC Posts: Week 1: The Befores | Week 2 – you are here! | Week 3 | Week 4 | Week 5 | Week 6
The Guest Participant Link-ups: Week 1 | Week 2 | Week 3 | Week 4 | Week 5 | Week 6
Featured Designers for April 2019:
At Home With Ashley | Casey Keasler | Dorsey Designs | The Farmhouse Project | Home Made by Carmona House of Funk | House of Jade Interiors | House Seven Design | House That Lars Built | Inspired by Charm | Jana Bek | Jessica Brigham | Kelly Golightly | Murphy Deesign | The Pink Pagoda | Sarah Gunn | Sherry Hart Designs | Sugar & Cloth | Veronica Solomon | Vintage Revivals |
And, if you’d like to check out my past ORCs, those posts are here:
04.18 Powder Room: Week 1 Befores | Week 2 Wallpaper | Week 3 Mirror | Week 4 Sink Skirt | Week 5 Storage | Week 6 Reveal
10.18 Master Bedroom: Week 1: The Befores | Week 2: The Plan | Week 3: The Bed | Week 4: Lighting and Art | Week 5: The Bedding | Week 6: The Reveal
